

The following is a list of vegetables and herbs that you can plant in February in Sydney, a temperate zone. Just click on the name for the growing guide for each vegetable or herb:
- Amaranth
- Beans (dwarf)
- Beetroot
- Broccoli
- Brussel sprouts
- Carrot
- Cauliflower
- Chives
- Cucumber
- Endive
- Fennel
- Kohlrabi
- Leeks
- Lettuce
- Mustard greens
- Onion
- Parsley
- Radish
- Silverbeet
- Swedes
- Turnip
- Zucchini
Plant of the Month: The Wonderful Curcuma Longa- (Turmeric)

To view detail of any image on this post just click on the image.
Turmeric is a rhizomatous herbaceous perennial plant (Curcuma longa) and a member of the ginger family. It is native to tropical South Asia and has as many as 133 species identified worldwide.
Turmeric is used in cooking across the world typically in its dried, powdered form but turmeric also is used fresh, like ginger. All parts of the plant: rhizome, leaves and flowers are edible.
Known as the ‘Golden Spice’ for its brilliant yellow colour, it is also used in many products such as canned beverages, baked products, dairy products, ice cream, yogurt, yellow cakes, orange juice, biscuits, popcorn, cereals and sauces. It is a principal ingredient in curry powders.
Turmeric powder has a warm, bitter, black pepper-like flavour and earthy, mustard- like aroma.
Turmeric is also a plant that has a very long history of medicinal use, dating back nearly 4000 years and in Southeast Asia, as a component in religious ceremonies.
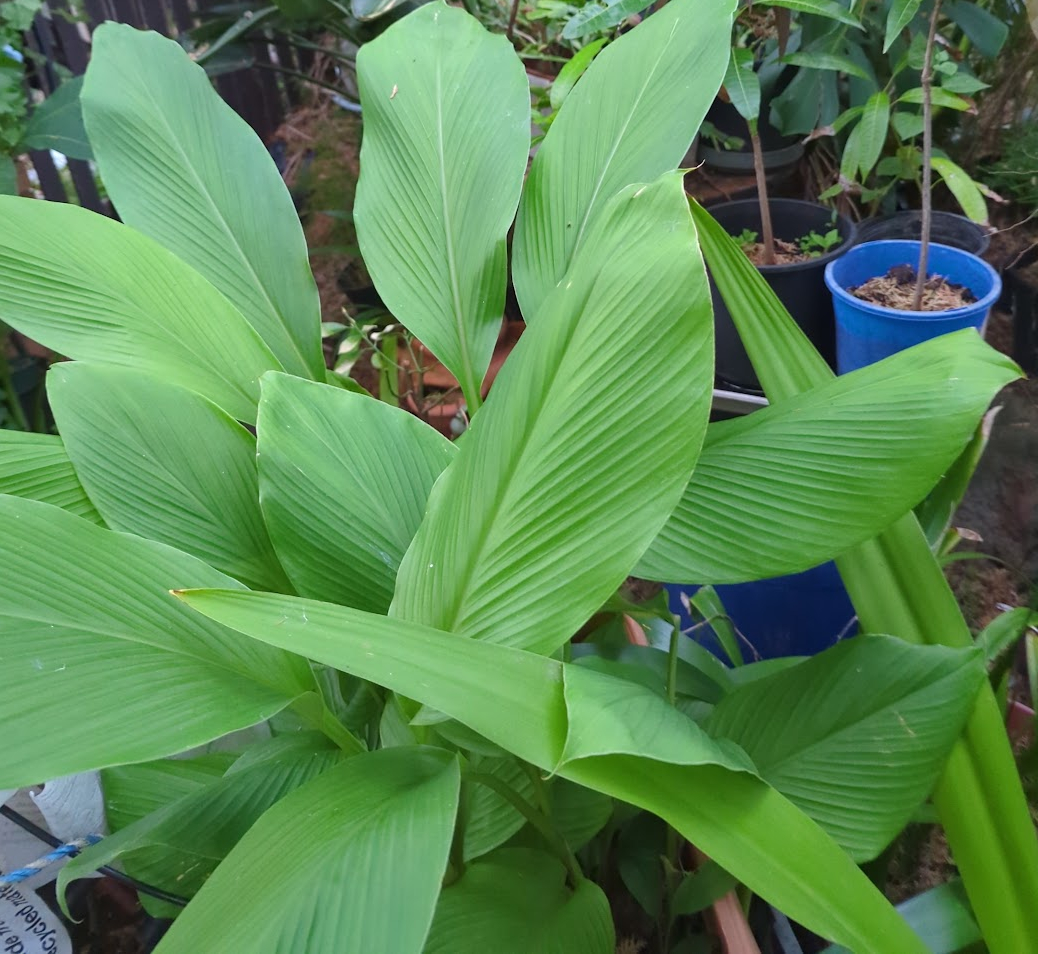
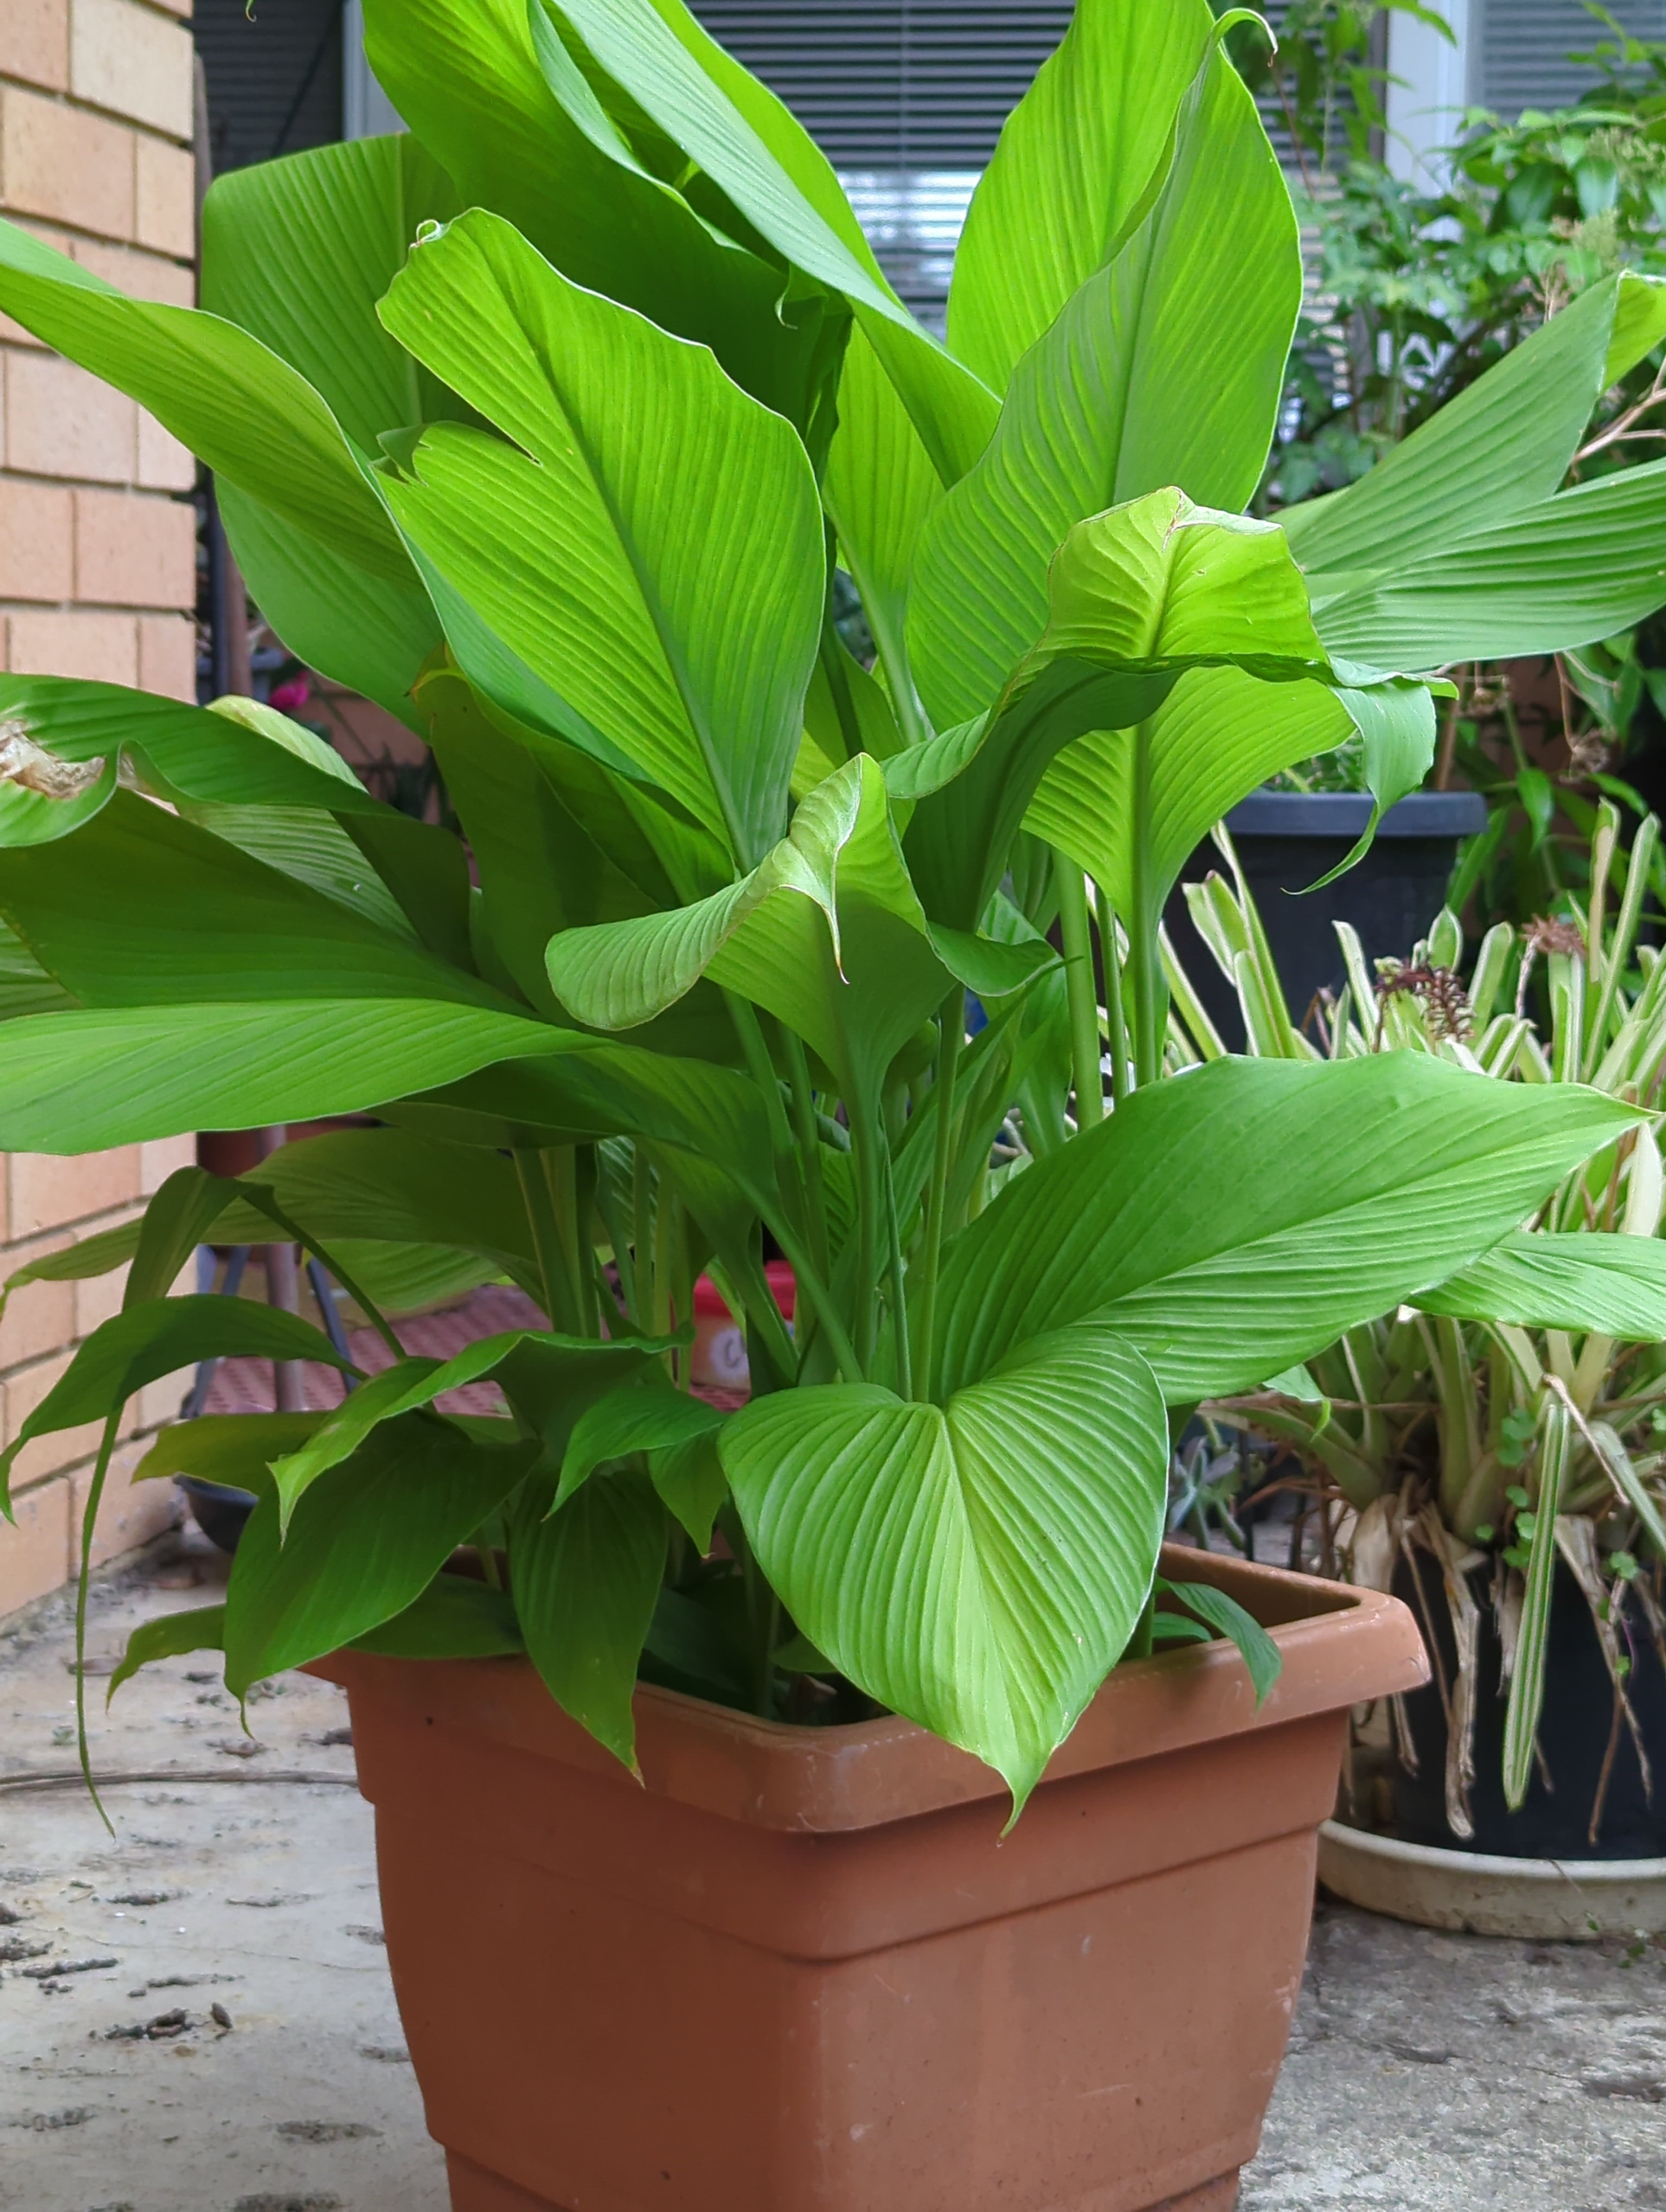
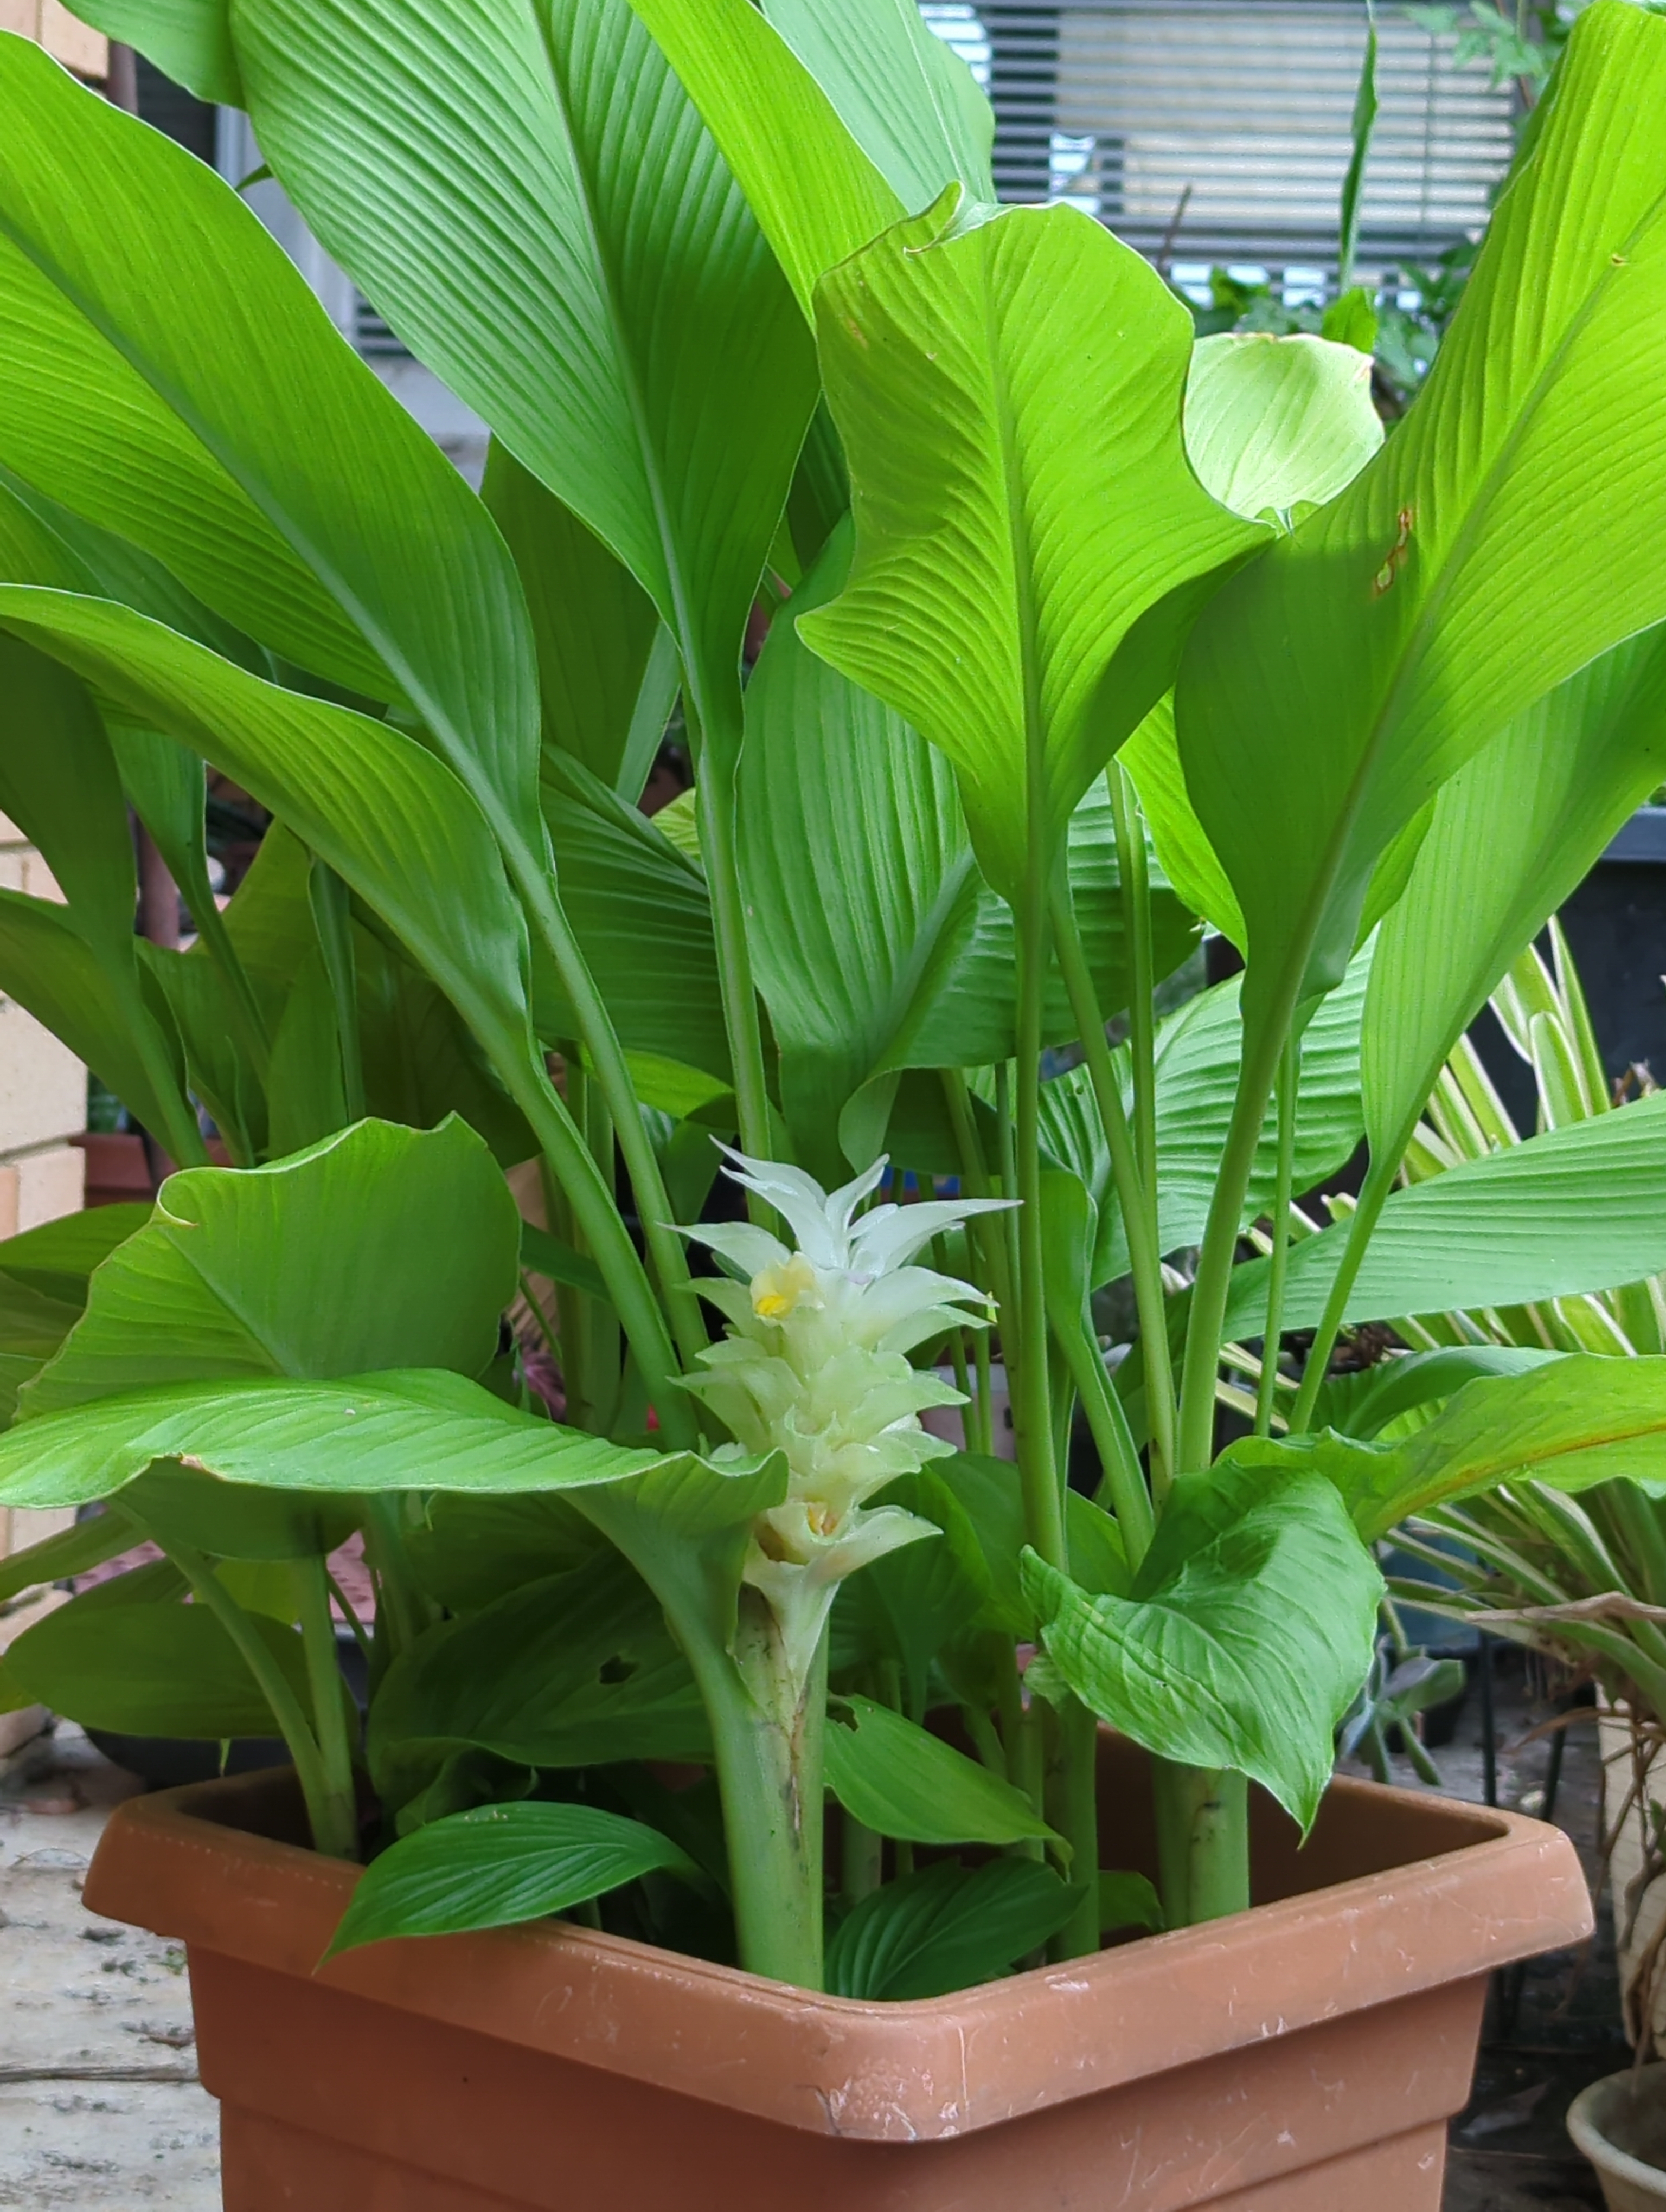
For me, I love its beauty and its glorious exotic green leaves. It is a plant that grows so well in the warm and humid Sydney climate and grows wonderfully well in pots. I can enjoy the beauty of its leaves all year and when it goes dormant in winter I could harvest its rhizomes for cooking as well as for propagating and creating more potted plants! To be honest I just leave it to grow!
Its large ribbed leaves create a lush and tropical look in any garden or patio.

When the plant is mature and the season favourable, it also gives me a spectacular surprise unfurling its delicate and fragrant inflorescence. This is what I want to share with you today and encourage you to add this amazing plant to a spot in your garden or shaded patio.
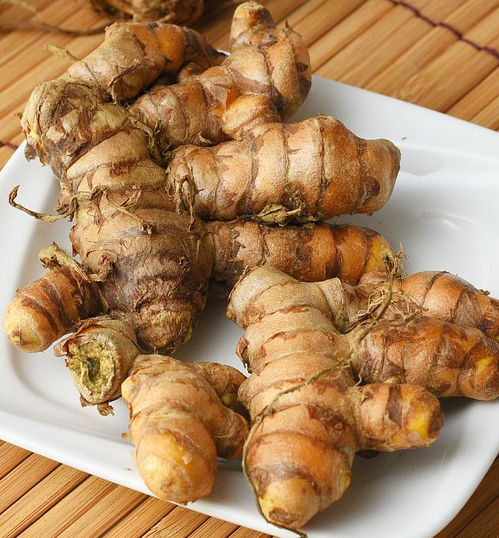
The Turmeric plant reaches up to 1 m arising out of highly branched, yellow to orange, cylindrical, aromatic rhizomes.
The leaves of the turmeric are alternate and arranged in two rows. They are divided into leaf sheath, petiole, and leaf blade.
From the leaf sheaths, a false stem forms. This is the petiole or stalk that supports the leaf on the stem and is 50 to 115 cm long. It is able to twist the leaf to face the sun, adjusting the foliage arrangement (spacing of blades), and also optimising its exposure to sunlight.
The simple leaf blades are usually 76 to 115 cm long and rarely up to 230 cm. They have a width of 38 to 45 cm and are oblong to elliptical, narrowing at the tip. These sizes are for plants in the ground. If grown in pots the leaves are smaller but still substantial with a length of 45 cm and a width of 19 cm.
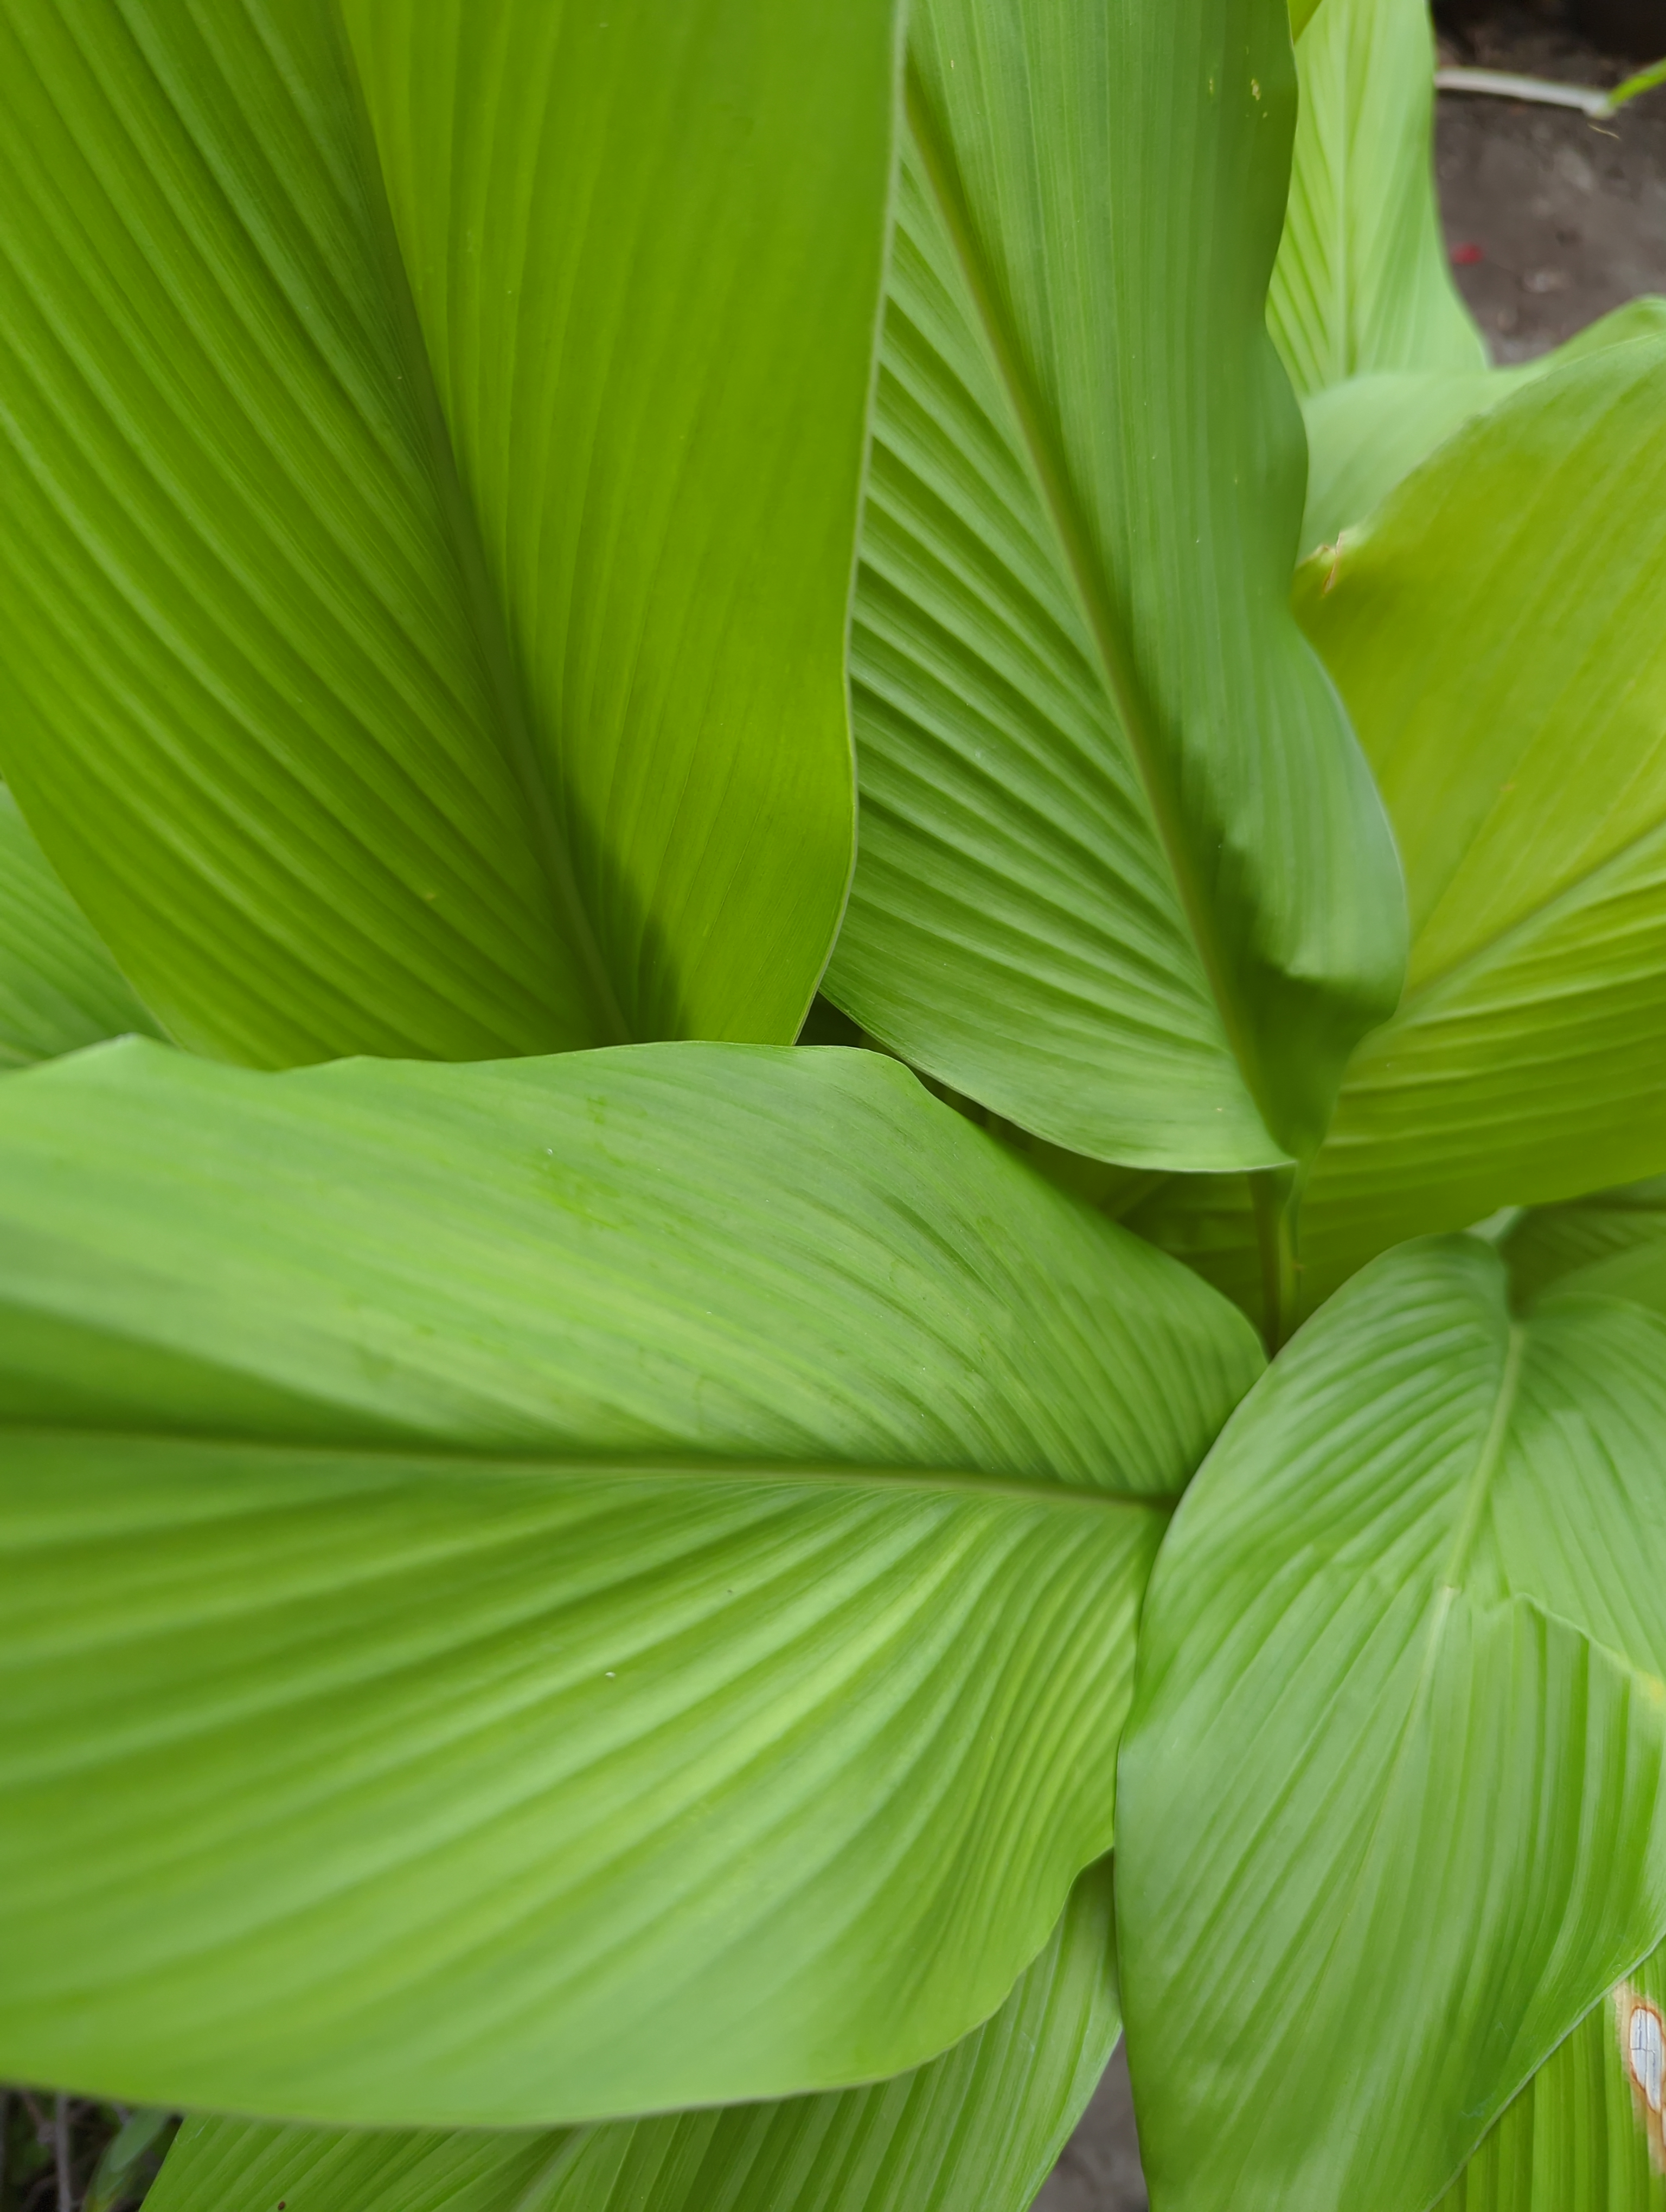
The tips of the leaves are curved to a point to draw moisture down the leaf.
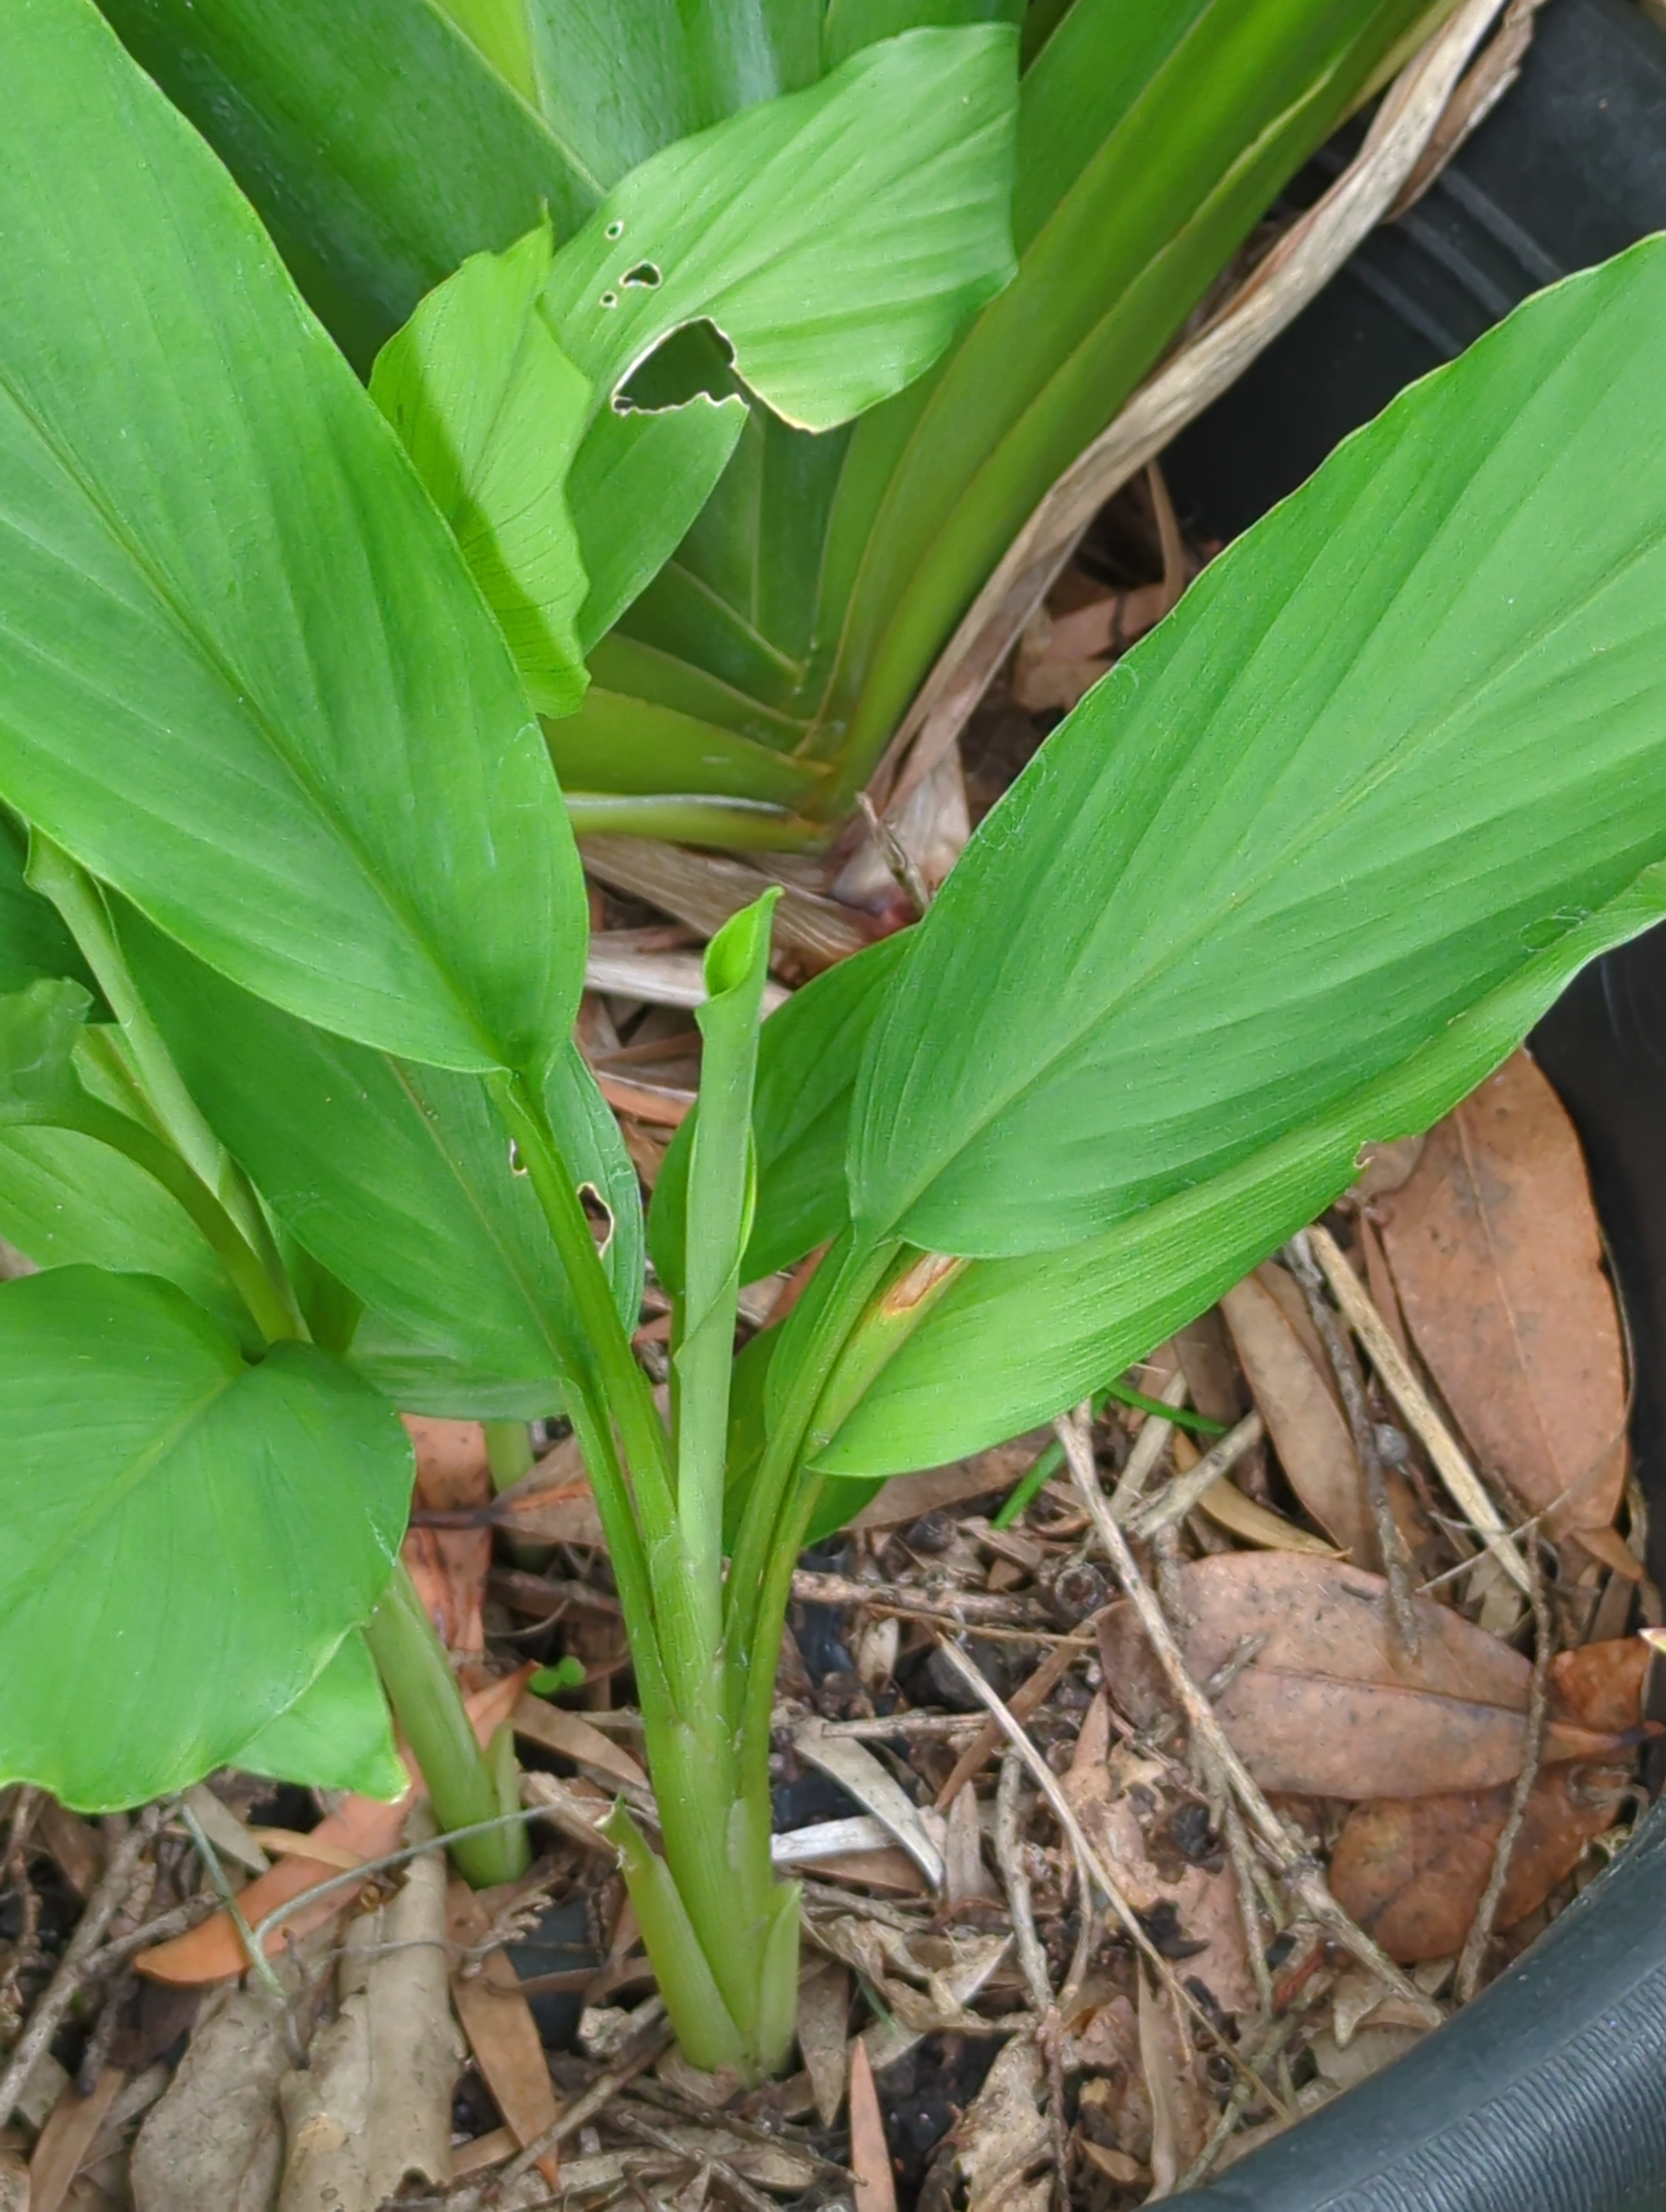
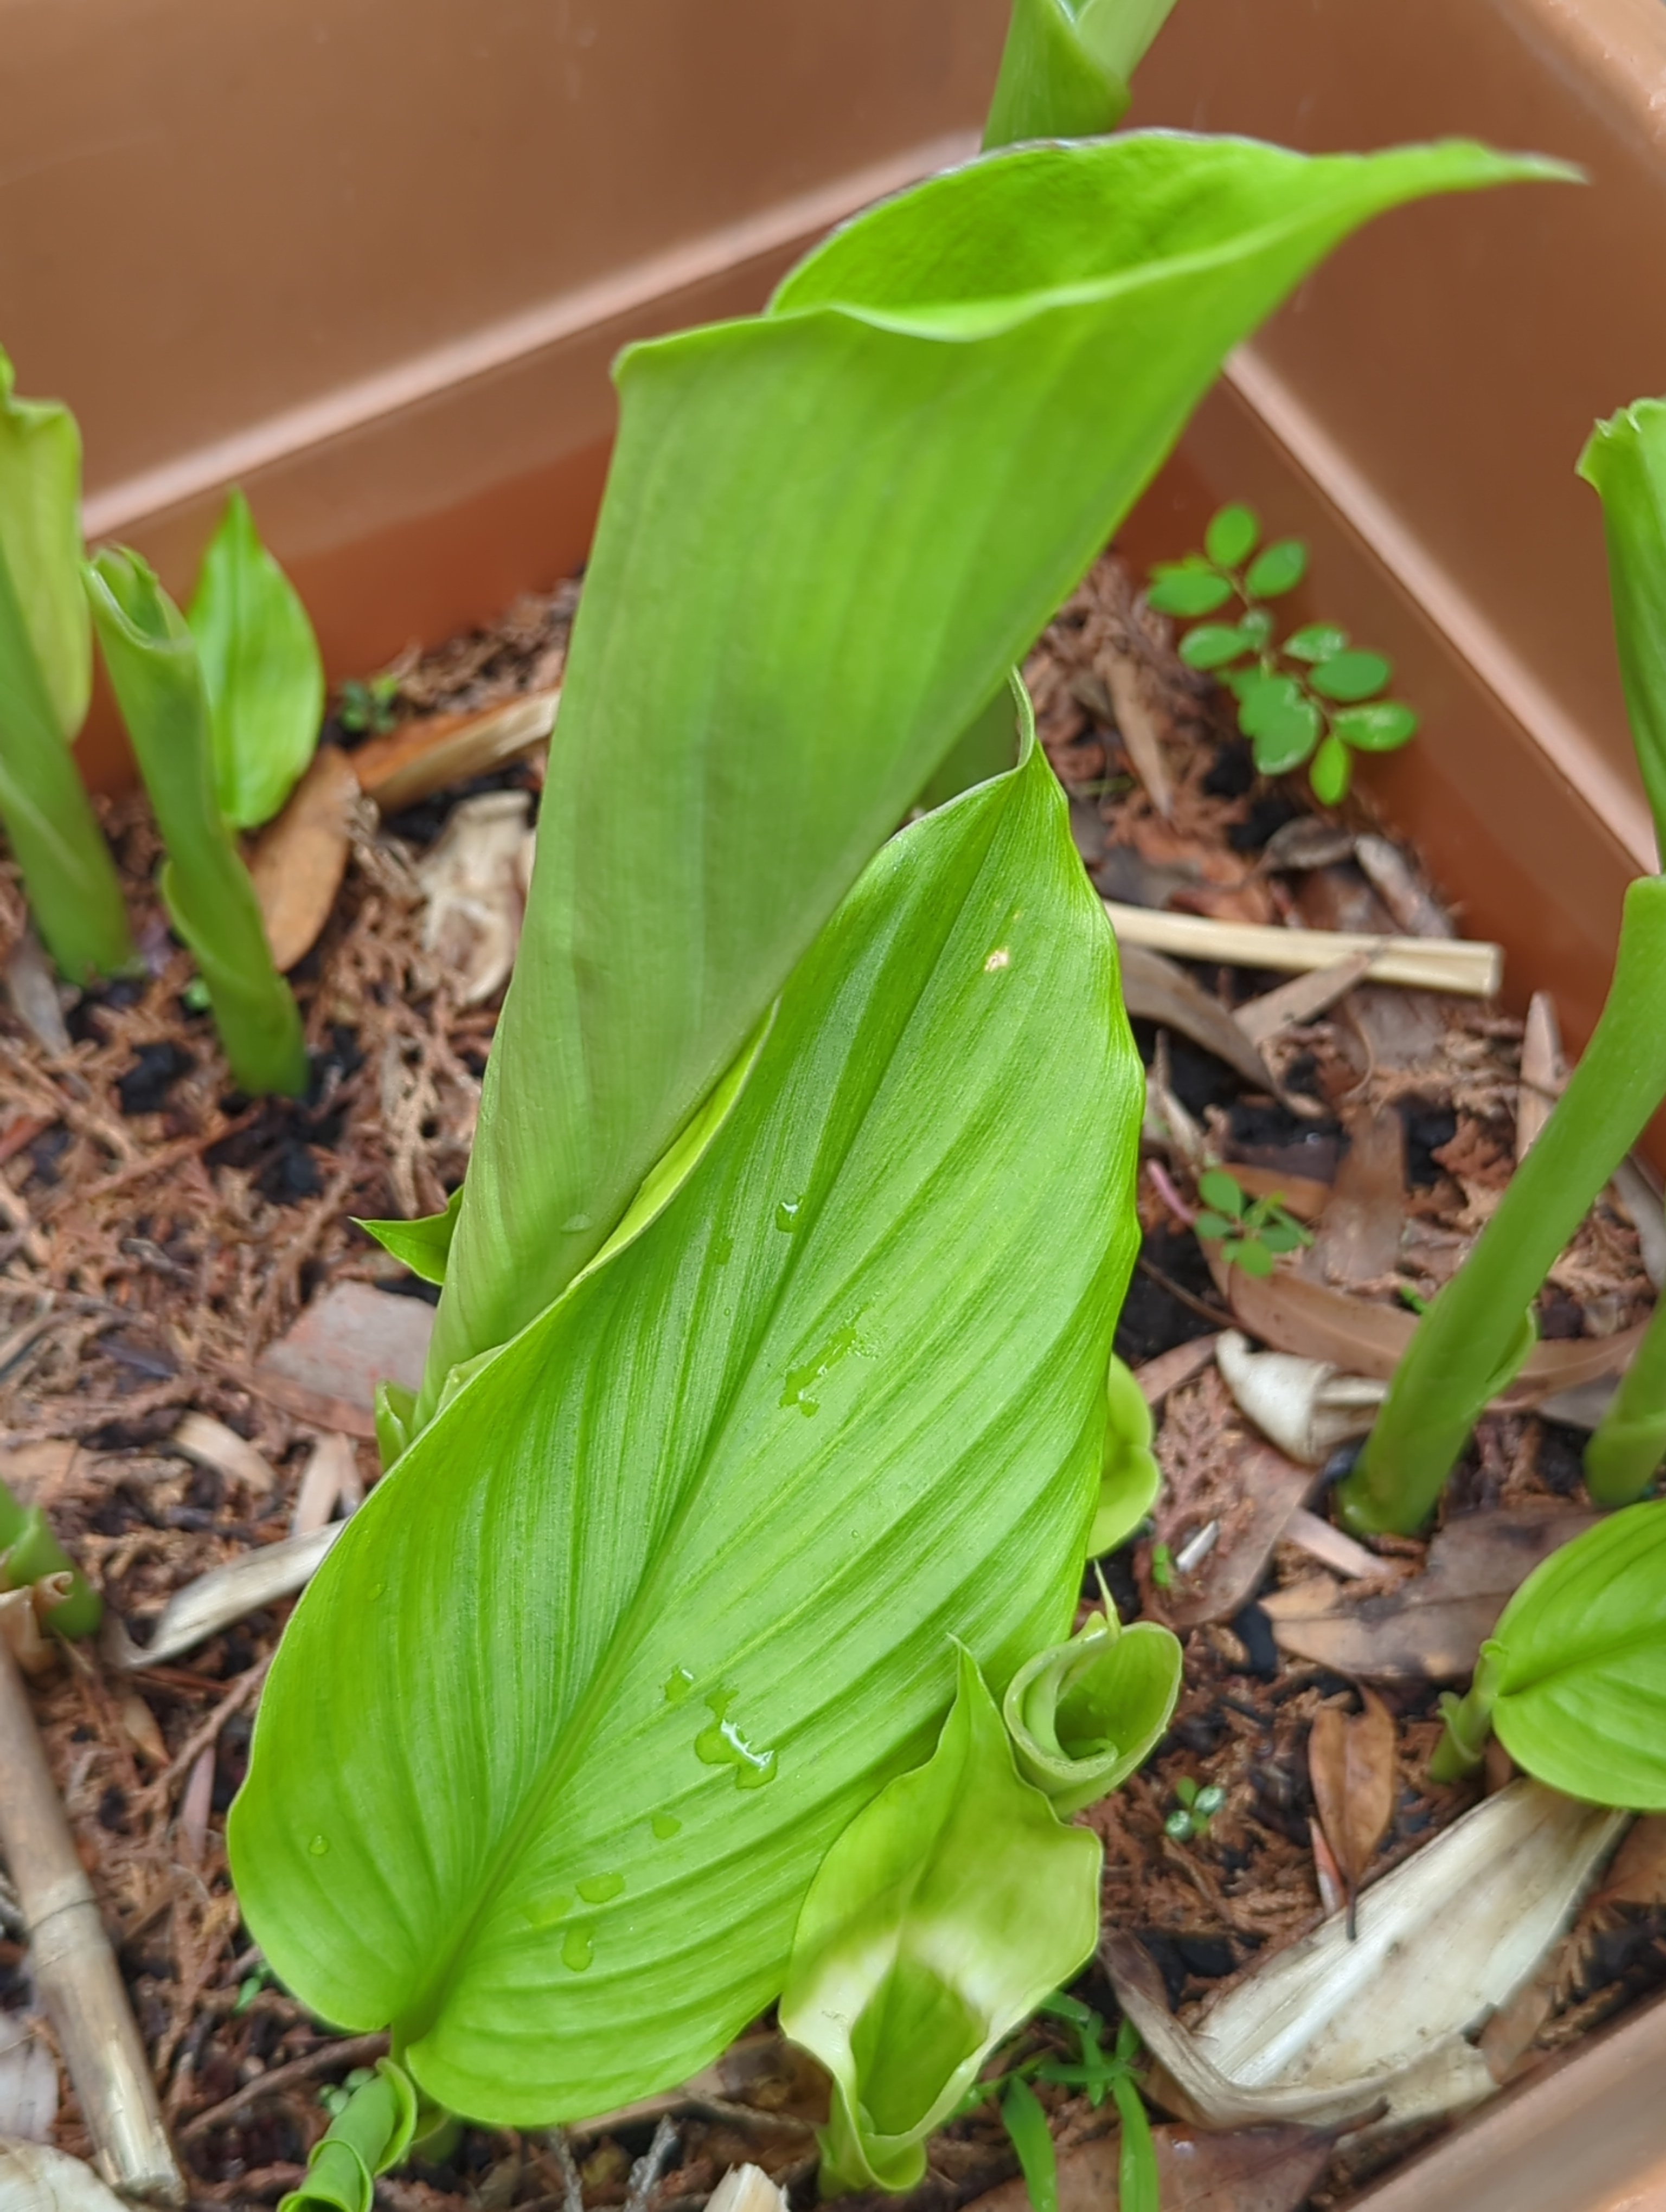
The leaves die down in autumn and reappear in late spring. Sometimes it may seem as if they will never sprout but patience is required as they appear long after many bulbs have already sprouted and flowered. The moment the pencil like tightly wrapped set of leaves emerge from the soil and unfurl takes one by surprise often. The soil temperature needs to be consistently 12 C or warmer and the daytime temperature around 21 C or more. That being said, when the time is right they do emerge. Its patience, patience, patience.
The plants in this pot have been there for many years and have been left undisturbed to be appreciated for their lovely leaves. They have kept me waiting every year.

When left undisturbed and the environmental conditions are right, the turmeric plant will develop an inflorescence, a cluster of flowers on a stem, close to the base and protected by the leaves above.
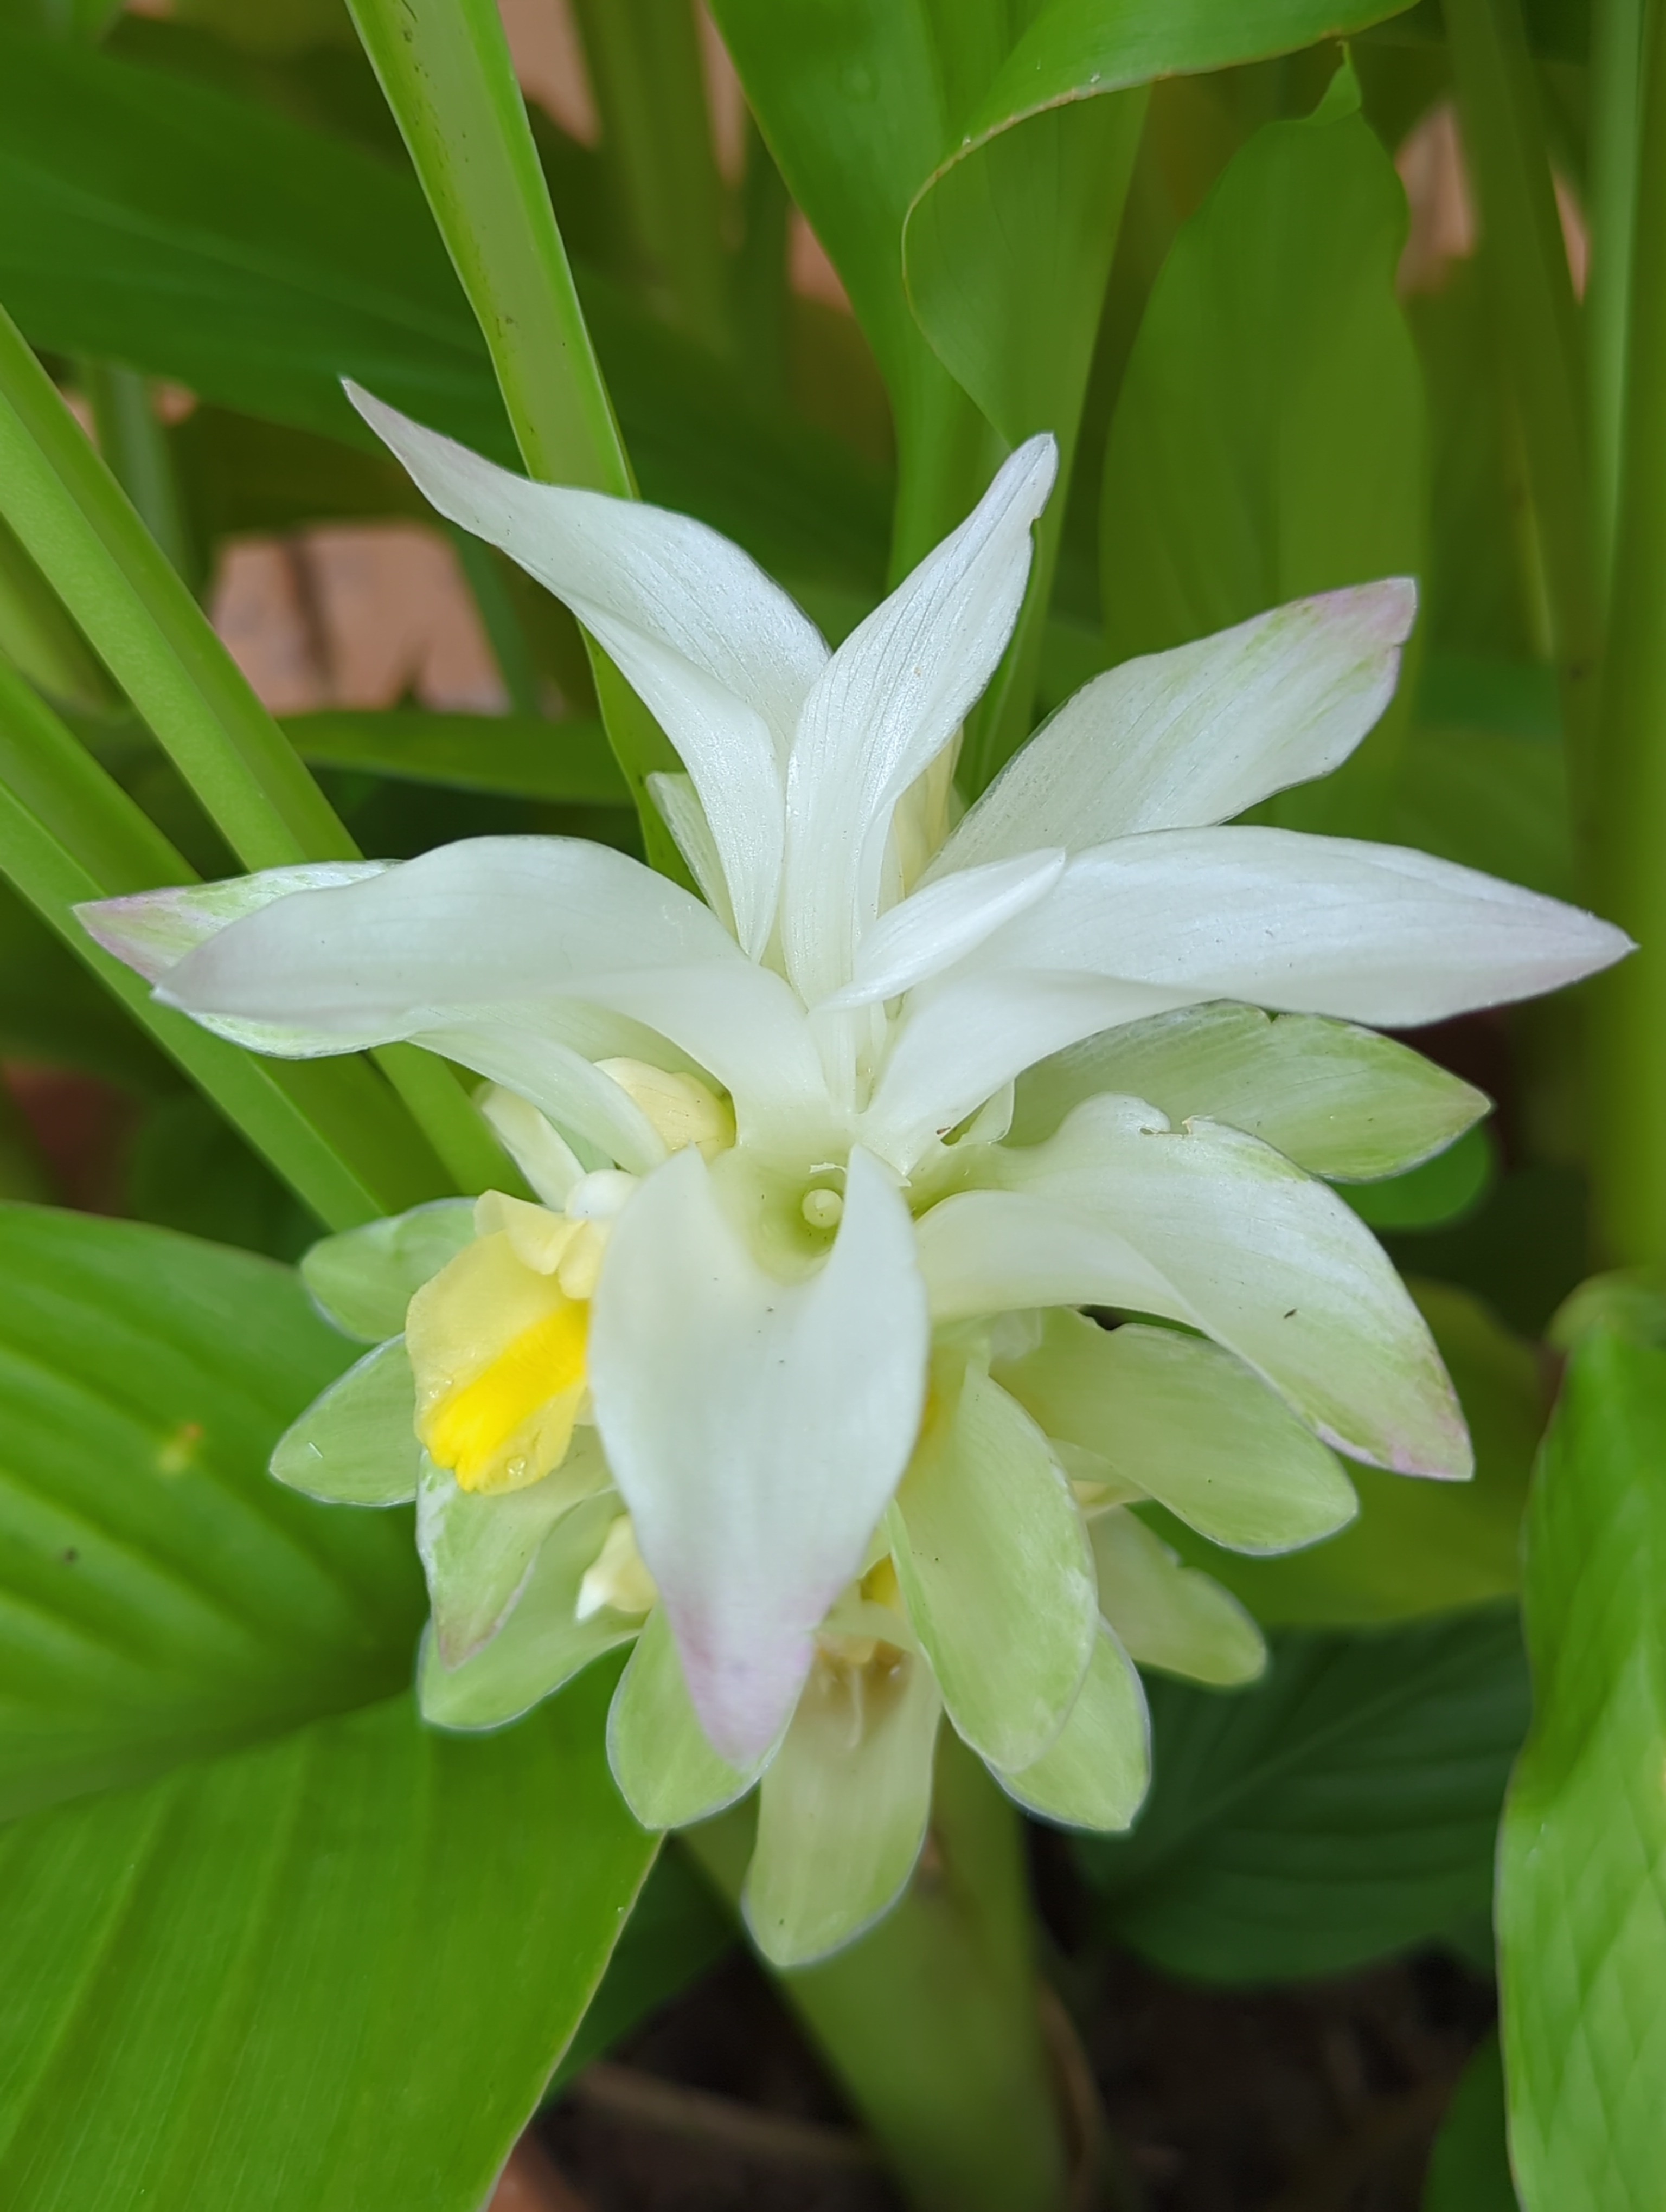
At the top of the inflorescence, stem bracts, modified leaves, are present on which no flowers occur; these are white to green on the lower bracts and tinged reddish-purple, on the ends of the upper bracts. the bracts are tapered.
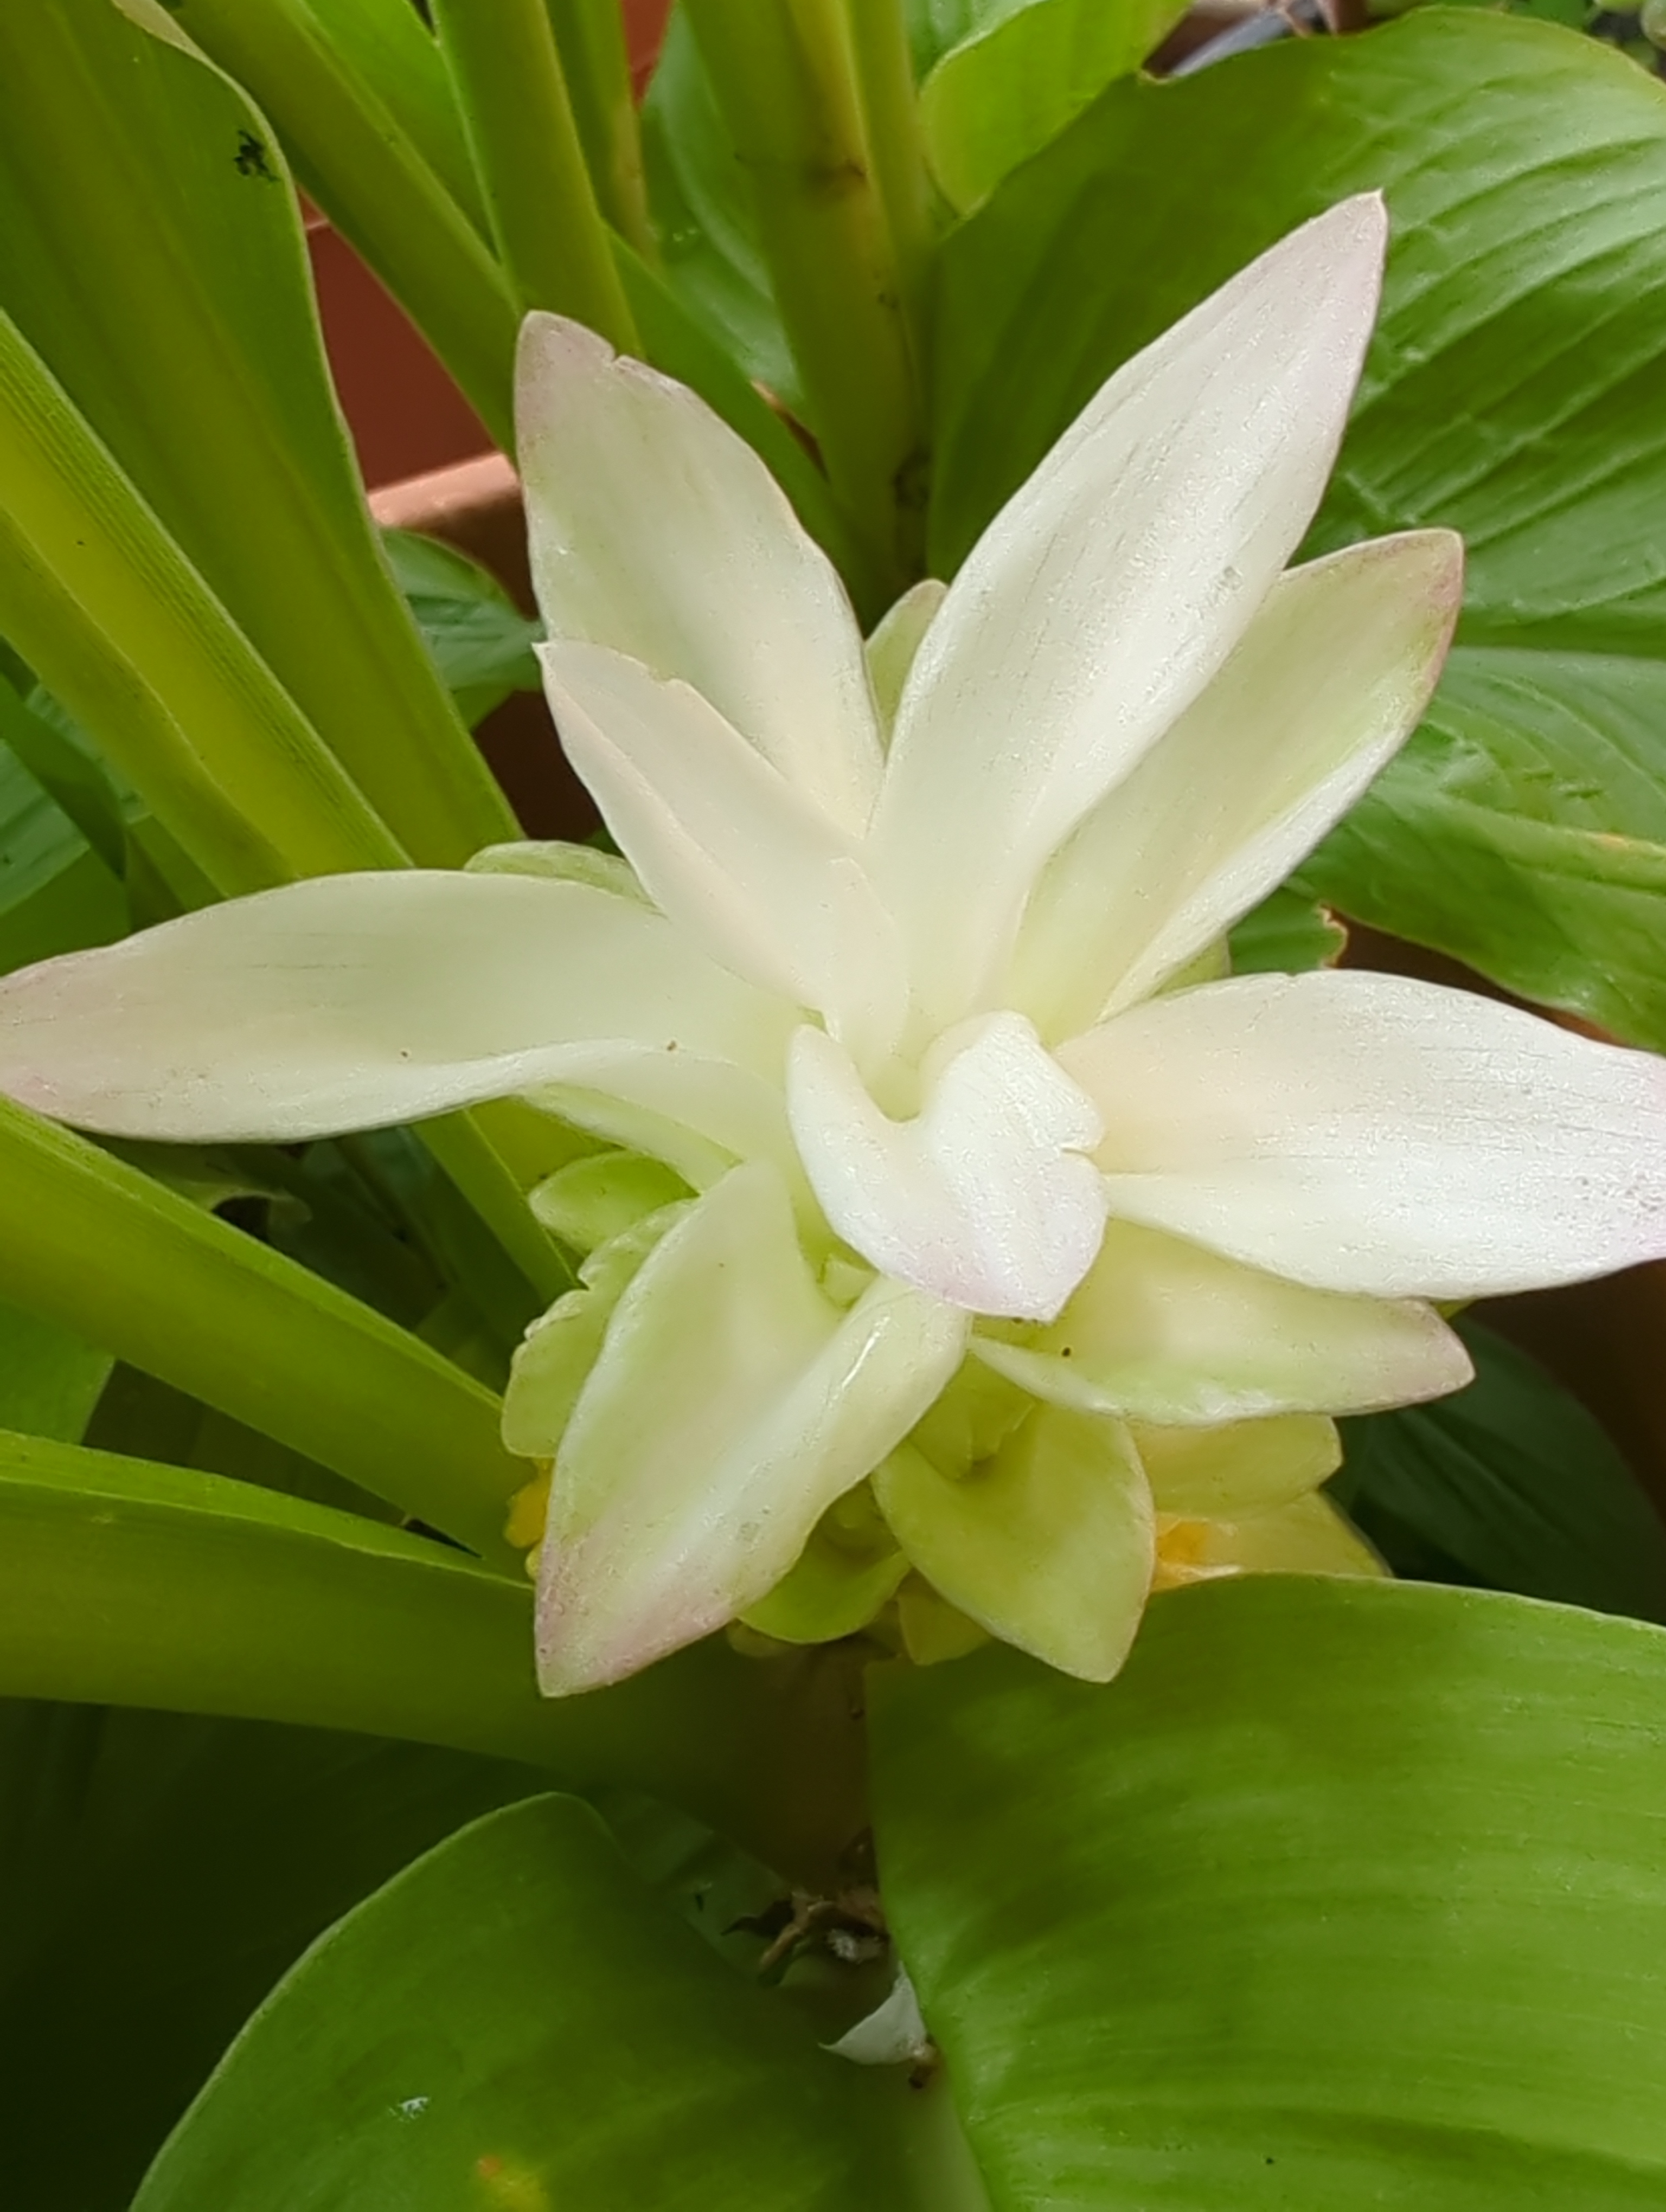
The true flowers are white/yellow and emerge from the inflorescence stem from deep within the bracts.
The hermaphrodite flowers each carrying male and female parts are zygomorphic or yoke shaped and flowers can be divided by only a single plane into two mirror-image halves.
The flower parts are in threes.
The three sepals are 0.8 to 1.2 cm long, fused, and white, and have fluffy hairs.
The three bright-yellow petals are fused into a corolla tube up to 3 cm long. The three corolla lobes have a length of 1.0 to 1.5 cm and are triangular with soft-spiny upper ends. See the images below for further detail.
The image below shows the three white sepals with their uneven “teeth” that enclose the yellow flowers.
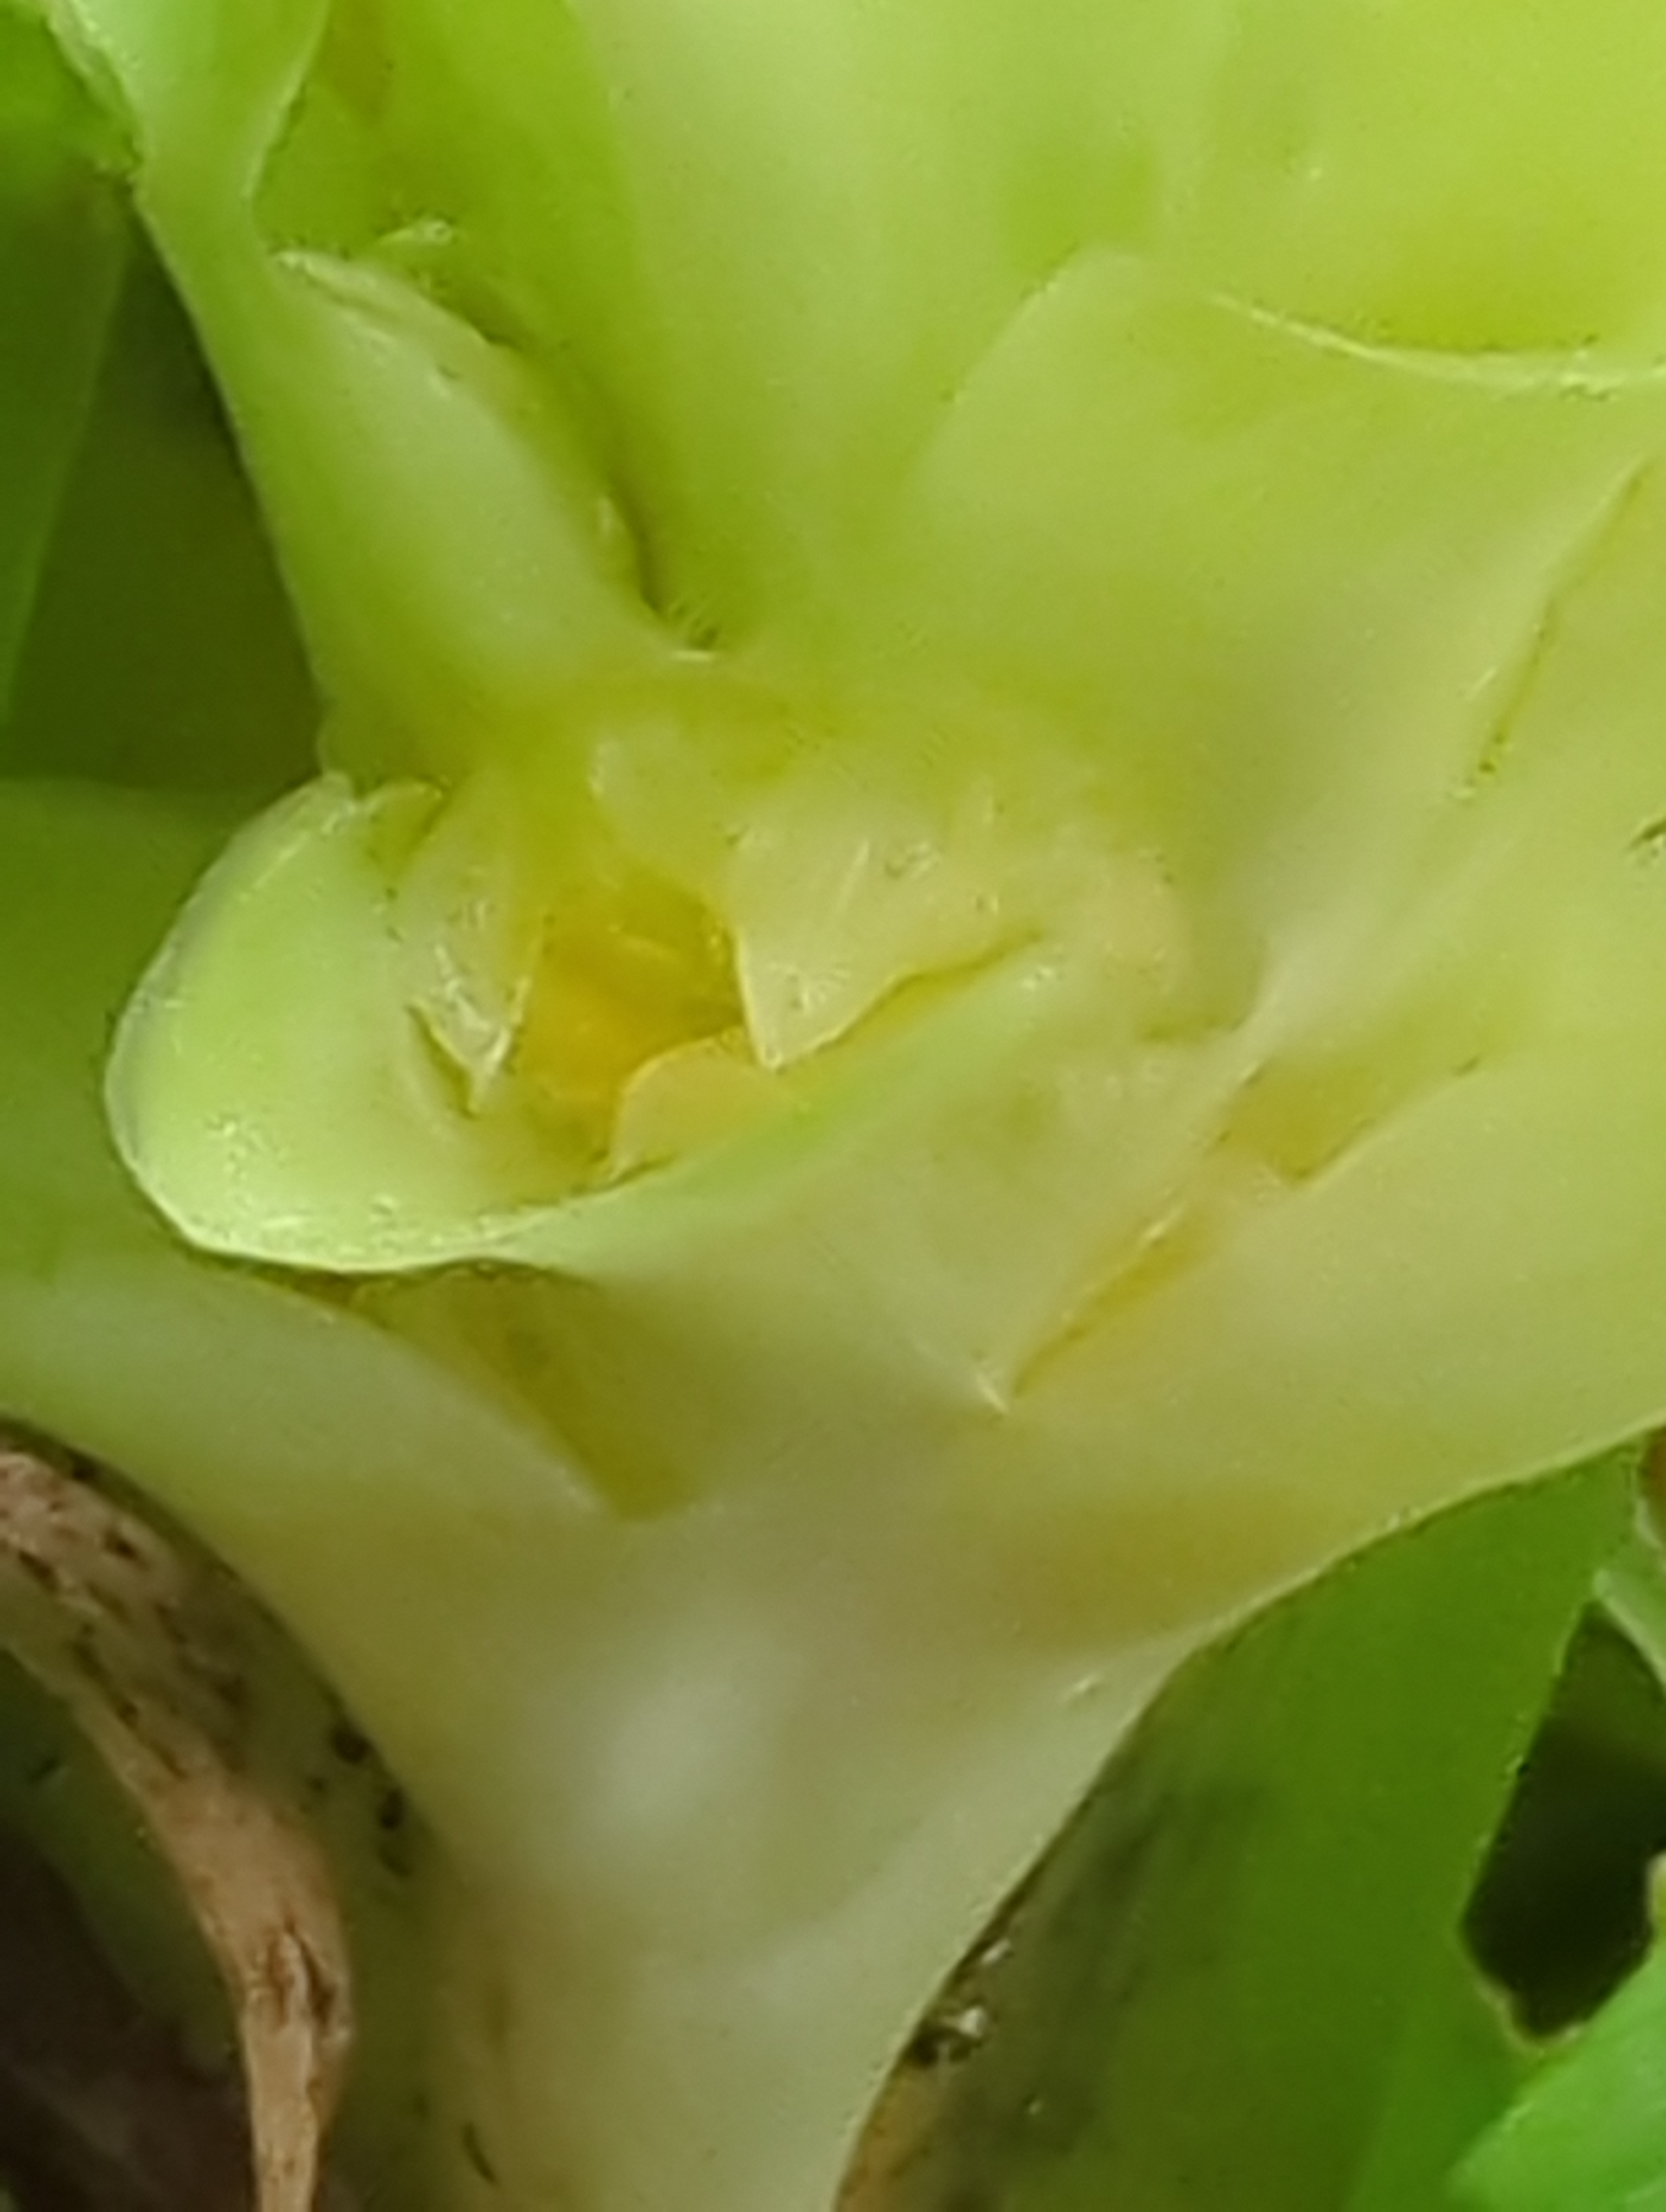
The three bright-yellow petals are fused into a corolla tube up to 3 cm long. The three corolla lobes have a length of 1.0 to 1.5 cm and are triangular with soft-spiny upper ends.

The labellum, the larger of the three fused petals is yellowish, with a yellow ribbon in its center and with 1.2 to 2.0 cm long. It is larger and strongly coloured to attract pollinators.


The image below shows the beauty of the yellow turmeric flowers on the bracts of the developing inflorescence nestled low in the shade of the broad ribbed leaves.

Cultivation:
It is easy to find turmeric for sale at your green grocer and in fact that is how I have started growing my plants, when a piece I had bought started to sprout.
Just select a firm rhizome that has a few white ‘buds’ from which the plant will sprout. Cut the pieces so that each piece has 2-3 buds and allow to dry out for a couple of days to callus over the cut ends.
Site and Soil Requirements:
Turmeric prefers a moist soil that has good drainage but is rich in organic matter. A raised bed can allow water to drain and prevent water logging and so prevent the rhizomes from rotting.
Dig the site over to a depth of 30 cm and enrich the soil with aged cow manure and well rotted compost. Turmeric prefers a soil with a pH of 6.0-6.5 so test your soil and amend it accordingly.
Select a site that gets sun or part shade as the leaves can burn in strong sunshine. This is especially important in locations like Sydney that get extreme heat in summer. Ideally the site would get 3-4 hours of morning sun and afternoon shade in these areas. Elsewhere in mild climates the plants can be grown in full sun or cool climates against a north facing wall that radiates heat.
Turmeric can also be planted under the canopy of trees if the climate has periods of extreme heat.
As Turmeric is frost tender make sure that the located planting position will be frost free or if this is not possible then grow your turmeric in pots that can be moved in winter.
As the leaves are somewhat tender do try to choose a site protected from strong winds that not only will damage the leaves but also will dry out the plants
If you are planting for a good harvest then try and get the most sunshine possible to ensure for a quality crop.
If choosing to grow your turmeric in pots, use a quality potting mix and make sure your container is large enough for mature plants; a minimum of 40 litres is recommended. Make sure that the pot has good drainage holes and put some stones over these to stop soil leeching out during watering.
The benefit of growing in pots is that you can take advantage of more sun during milder weather and moving pots out of extreme sun in summer.
Turmeric likes humid conditions so grown in the company of other plants allows the natural build up of humidity around the plant. Grouping plants together increases the humidity in the air. Their leaves, stems, and flowers transpire. This process gives off humidity, thereby creating humidity for the other plants in the shared space.
I have used this method to protect plants on extreme heat days in summer. During milder weather each plant’s need can be met by moving them around.
Planting:
Turmeric should be planted when the soil is warm so this should be in late spring or early summer.
Water the site before planting to ensure the soil is moist, though not damp.
Plant the cut rhizomes with the buds facing up at a depth of 5 cm and spacing them about 15 cm apart.
Keep the soil just moist but not wet until the shoots emerge. Mulch lightly with sugar cane mulch to conserve moisture and to keep weeds at bay. It takes about 9-10 months to grow to maturity.
Water Needs:
Turmeric plants need regular watering during the growing season. How often will depend on the natural rainfall pattern of your area. Check the soil and water accordingly.
If you notice the leaves curling inwards this is sign that turmeric is in need of water. Checking your plants often is especially important during periods of extreme heat, drought or windy weather. The leaf blades should be flat and opened out.
Do not let soil dry out, keeping the soil evenly moist but not waterlogged.
Water deeply in the early morning or late afternoon and avoid watering the leaves of plants to avoid fungal diseases.
Keeping a close eye on soil in potted plants is important in summer and when in flower.
Reducing watering as the plant dies back in winter as this will encourage rhizome growth.
Fertilising:
Applying a balanced fertiliser or one formulated for fruit and vegetables can be beneficial for turmeric.
Apply slow release fertiliser at the recommended rate when shoots are 5-10 cm tall.
Apply liquid fertiliser at the recommended rate and frequency during spring and summer.
Harvesting:

As turmeric is a perennial and has a creeping rhizome that increases the clumps they will need to be broken up and fresh pieces planted every 3 to 4 years.
If you are growing turmeric for cooking or for its medicinal uses it will take up to two years to get a good crop. You can however remove a plant and harvest as required.
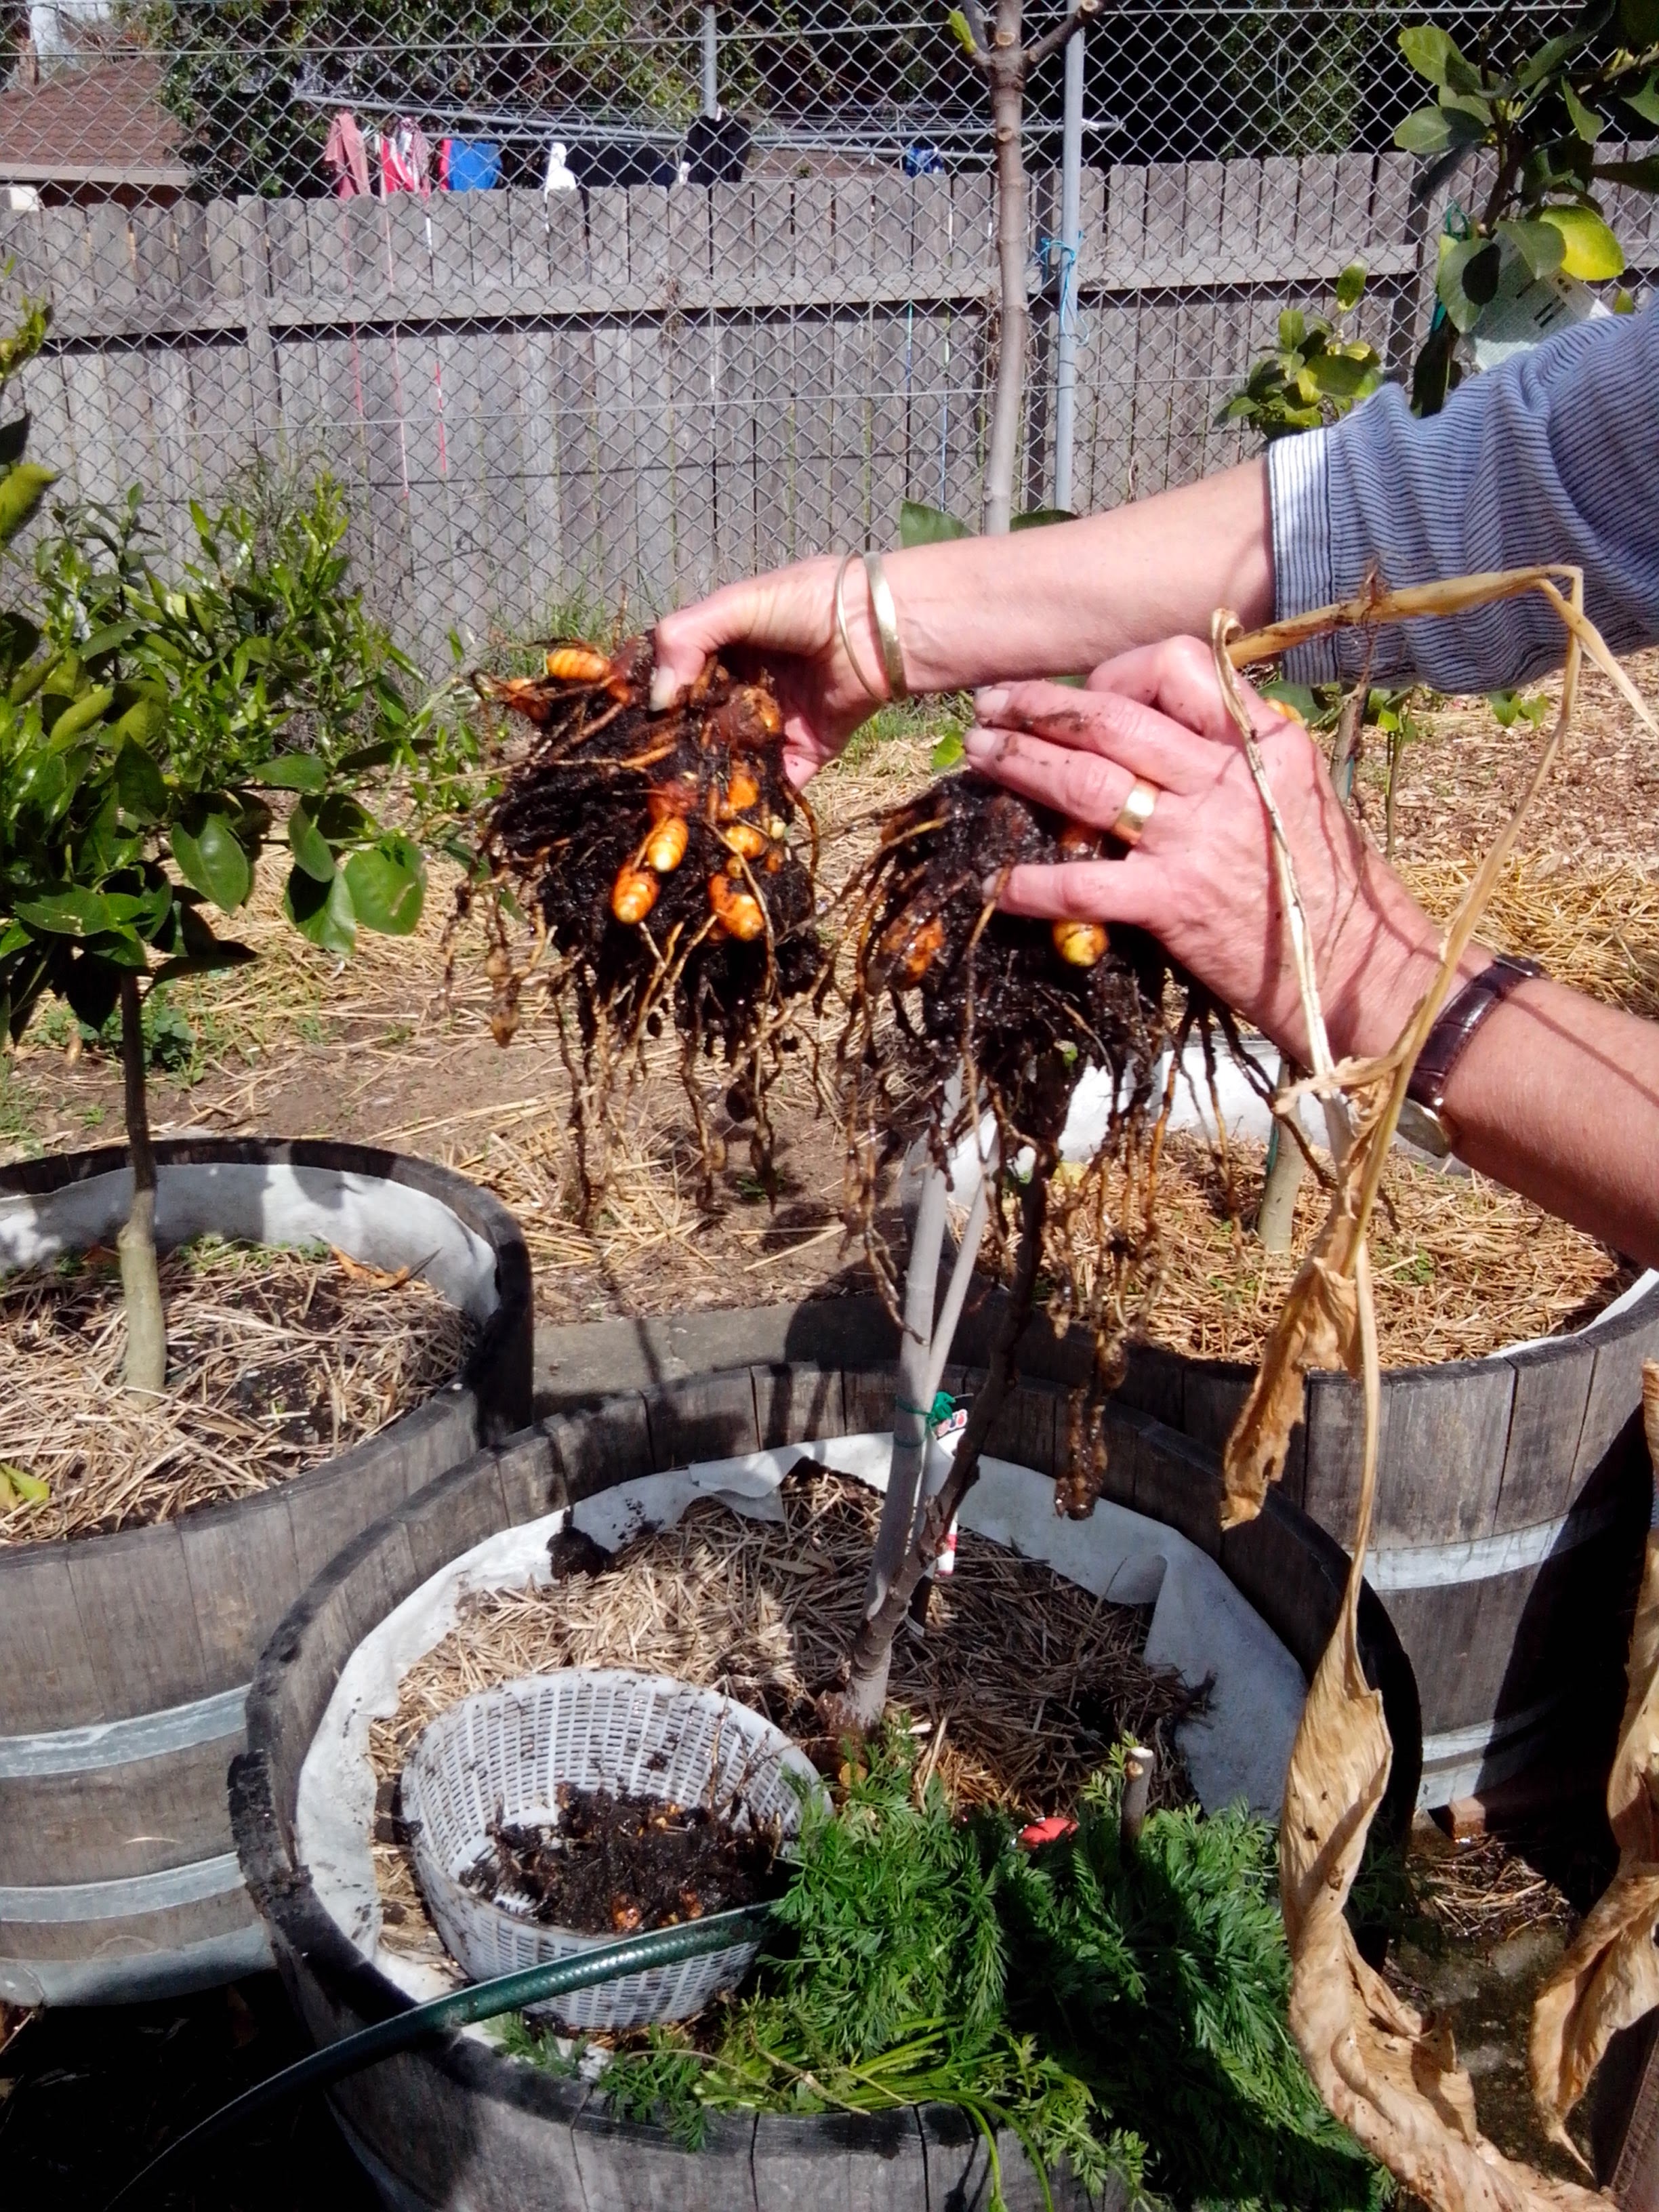
Harvest individual rhizomes in late autumn or winter when the foliage begins to yellow and the stems dry out and die back.
Carefully loosen the soil around the plants to unearth the rhizomes from the ground. Remove any excess soil and cut the stems 1-2 cm above the top of the rhizome.
Wash and dry the turmeric rhizomes fully before processing them for your needs.
Store turmeric unpeeled at room temperature or in an air-tight container in the fridge. for up to two weeks.
For longer term storage, turmeric can be peeled and frozen for up to 6 months.
It can be dried and ground into a powder. Store the turmeric powder in an airtight glass container in a cool, dark cupboard, away from direct heat or sunlight.
Take care when handling fresh turmeric as it can stain your hands and permanently stain clothing, cutting boards, plastic containers and cooking utensils.
Turmeric is an easy care plant that can be grown in the garden, in pots on balconies, patios and even indoors in brightly lit rooms. There is no space too small to grow turmeric. You can grow it to harvest its rhizomes or like me, just for the beauty of its leaves and the joy of the occasional gorgeous flower.
When you see the rhizomes for sale at your green grocer why not buy a piece and grow some at your home.

