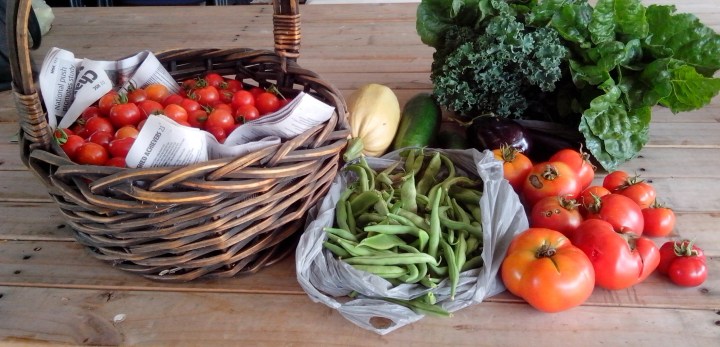
Gardening is a wonderful activity. First the plants give you fresh organic food and once the season is over they give you the next years seeds at no cost if you harvest them and store them well. Just ten little bean seeds, judiciously planted and cared for, can feed a family all through the long summer.
The Benefits of Seed Saving:
- The home gardener selects the strongest plants when thinning early in the plant life and notes which plants seem to be the healthiest, most productive and are strong and vigorous growers. Seed saving from these plants also has the advantage that these specimens will be well adapted to your own area and so have a greater success rate.
- If you grow heirloom varieties that are not so easily accessible you will have ongoing seeds to continue growing them and playing your part in ensuring plant diversity and maintaining threatened species.
How to Save Seeds:
Dry seeds:
- Select the best plant and make sure that the seeds or seed pods are fully dried out.
- You can put paper bags over the seed heads, eg. parsley, rocket, lettuce, tying the bags on to catch the seeds as they burst from the seed head.
- For peas and beans, select the fully dried pods from the healthiest most vigorous plants.
- You can remove the seed heads enclosed in paper bags and hang them upside down in a cool airy place to dry out completely.
How to process the seeds:
- The seed heads in paper bags can be shaken or rubbed vigorously to dislodge the seeds into the bag.
- Remove the stalks with whatever is still hanging on it to make the sorting of the seeds from the pods much easier.
- These can then be sifted in a fine sieve with openings just a bit bigger that the seeds, to separate the seed pods from the seeds.
- Fully dried bean and pea seeds can be shelled and allowed to air dry until fully dried
Seeds from fruits:
- Seeds from tomatoes or other moist fruits need to be processed.
- Place the pulp containing the seeds in a jar or larger container of water and stir everything together well. Leave the seeds to ferment for seven days.
- At then end of this time the pulp will have released the seeds which, if viable will have sunken to the bottom and non viable ones will float.
- Separate the seeds from the pulp and rinse them in a sieve
- Place the seeds to dry carefully spreading them out on a ceramic plate
Take all the remnants like the dried separated seed heads, leaves and stalks and place in you compost bin so that any seeds that have been missed might sprout and give you a friendly visitor that once big enough to be identified can also be planted out. Having selected your seeds from healthy plants will mean that these too may produce well.
When the seeds are separated and dry
Make sure that the seeds are well dried to avoid them becoming mouldy and place them in paper envelopes labelling them well with the name of the plant, the location harvested and the date harvested.
Store the seeds in a cool dry place.
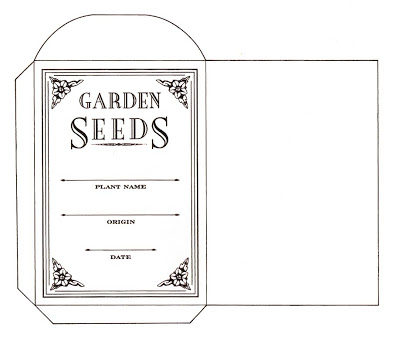
Seed Packet templates to download.
If you visit the Content in a Cottage Blogspot at the link below, Rosemary Beck has kindly made available downloadable seed packet templates and below is an image of one of the designs.
This will make your seed saving easy and there is space to write all the details of the seeds you are saving with space on the back to make individual notes such as planting dates . Share a gift of seeds with your friends and keep plant diversity alive.
Just go to this link for more information:
http://contentinacottage.blogspot.com.au/2008/08/flowers-and-seed-packet-pattern.html
Next year you will have a bumper harvest from the bounty of the seeds you saved and all from a little effort at the end of the season.